How to Make Willow Hoops
Willow hoops are versatile structures that can be used to craft all kinds of decorative pieces. People use them to make dreamcatchers, cool garden structures, and in my case for use as gorgeous floral wreaths.
I use this particular style of willow hoop for my DIY Scandinavian-style Christmas wreaths.
One of the best things about making willow hoops is their simplicity - they're easy to make and you don't need fancy gear. Once you’ve made them, there are all kinds of ways to get creative in decorating them.
In this article (and video) I’ll show you the step by step process for how to make willow hoops from scratch.
How to Make DIY Willow Hoops
What You’ll Need
Crafting your own willow hoops requires just a few simple materials:
Willow Rods: You'll need approximately seven willow rods per hoop. I've had success using both black maul willow and buff willow—they both work splendidly for creating sturdy and versatile hoops.
Secateurs/Snips: Having a good pair of secateurs or snips handy is essential. They'll help you trim and shape the willow rods as you craft the hoop, ensuring a neat and tidy finish.
How to Make Willow Hoops: Step-by-Step Instructions
The process of making the willow hoop is very simple.
Begin by soaking willow branches, making them pliable for weaving. Then, by looping, weaving, and shaping, create a sturdy circlet—perfect as a base for wreaths or decorative garden structures.
Here's how in easy steps:
Prepare the Willow:
Soak the willow branches in clean water to make them pliable. This will allow you to bend the rods without snapping them as willow gradually becomes dry and brittle over time.
The exact length of time will vary depending on a number of factors including the type of willow and the length of time since it was cut.
It can take anything from 2-2.5 hours up to several days, depending on the type. If in doubt, ask the supplier or read this guide for soaking willow.
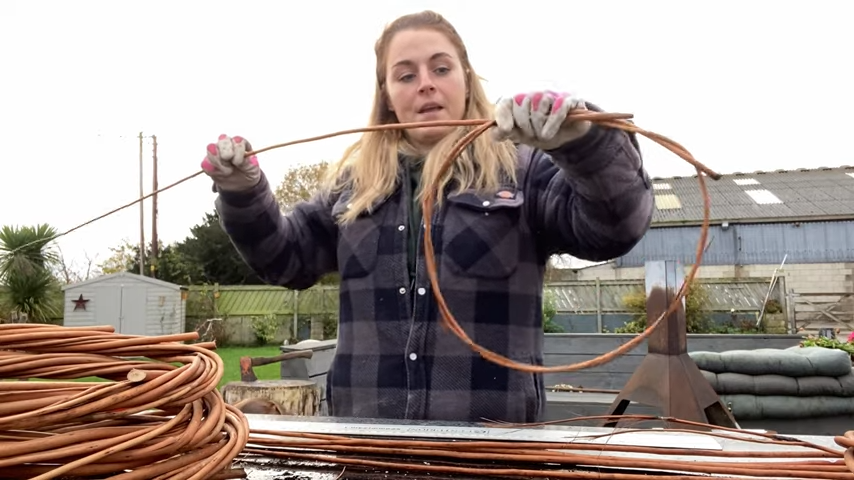
2. Create the First Hoop
Hold the thick end of a soaked willow branch and start by creating a basic knot or loop to form the initial circle, aiming for a 13-14 inch diameter.
Cross one side over the other to create the initial loop.
Continuously wrap the willow around itself, maintaining the circular shape.
Insert the thin end of the willow through the hoop, pulling it through the back to continue looping around.

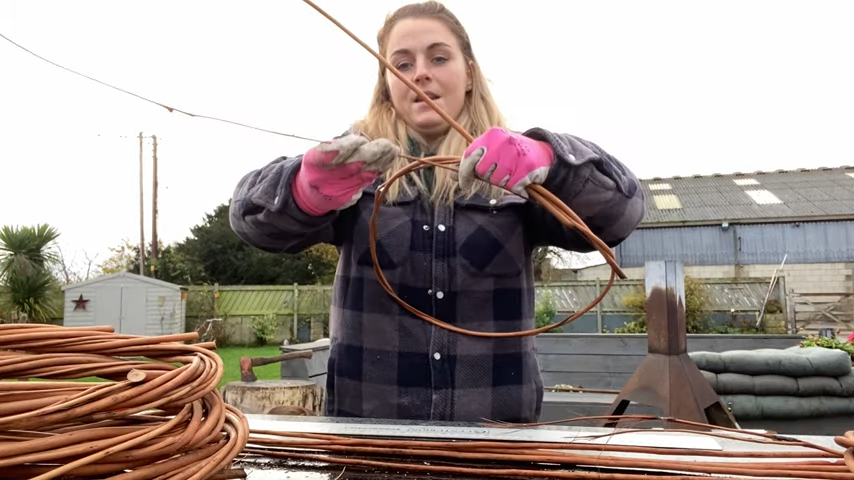
3. Build the Hoop Structure
Take a second willow rod and insert it in the same direction as the original rod.
Holding the original loop and the new rod in the same hand, feed the thin end of the new rod into the hoop and wrap around several times.
Ensure consistency in the direction and placement of the willow branches to form a sturdy and even hoop.
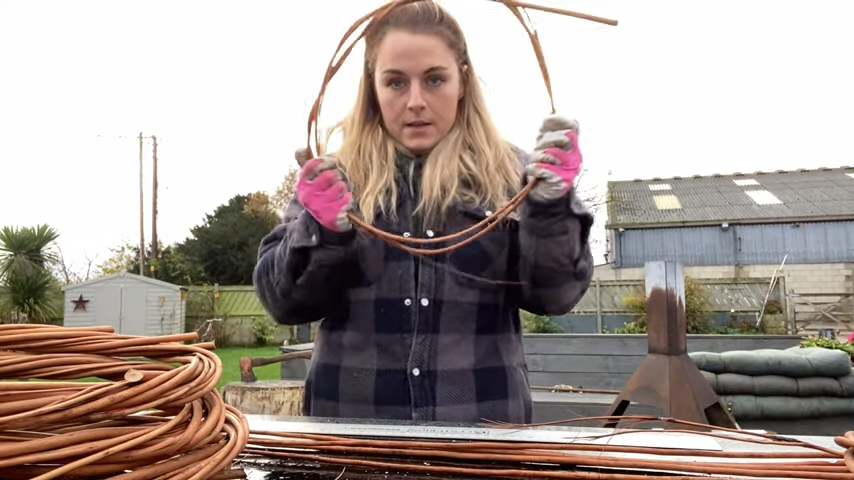
4. Complete the Hoop
Repeat with approximately seven willow rods in total to create the full hoop structure, interweaving them carefully as in the previous step.
Mold and shape the hoop as necessary to maintain its roundness and structure.

5. Final Touches
Trim any excess or protruding ends of the willow rods to tidy up the hoop's appearance. You can snip the rod right up to the point at which it intersects with the hoop.

Decorating Your Willow Hoops
There are plenty of ways to decorate your willow hoop so get creative in looking for ways to dress it up. Festive winter decorations are some of the most popular style of wreaths but all kinds of seasonal designs can look great.
You can tie all kinds of dried or freshly cut flowers, leaves, or ribbons etc. to the hoop to spruce up your wreath!

Crafting willow hoops opens doors to endless possibilities. These versatile structures aren't limited to wreaths; they're a canvas for creativity. From dreamcatchers to stunning floral wreaths like my Scandinavian Christmas designs, their simplicity is their beauty.
Embrace your artistic flair and elevate these circles with seasonal decorations—dried flowers, ribbons, or leaves—to personalise your masterpiece.