
Here’s some instructions, tips and tricks to get the most from your soil blocker.
First of all, here’s a video for all of you visual learners. In this video, I demonstrate two different techniques:
a) Sowing after making the blocks
b) Sowing before making the blocks
Personally, I prefer option b - sowing before pushing the blocks out, as the dibbles ensure good seed to soil contact.


Compost Mix
There have been lots of complicated soil blocking recipes posted on the internet over the years but my advice is to keep it simple and stick to what you know.
If you have a seed compost that you’re already happy with then continue to use it.
To prepare your seed starting mix for soil blocking simply wet the compost little by little until you can squeeze it in your fist and it sticks together. You should be able to squeeze one or two drops of water from the mix.
If your preferred compost is too coarse, sieve it before wetting it.
My preferred mix:
I prefer to use melcourt sylvagrow seed & cutting and I usually always add some biology in the form of homemade compost or worm compost, along with biological stimulants such as liquid seaweed/ humic acid.
Remember: if you’re using living composts, use de-chlorinated water. Dechlorinate water with humic acid (enough to colour the water light brown), vitamin C drops, letting water stand for 24 hours to gas off, or use rain water.

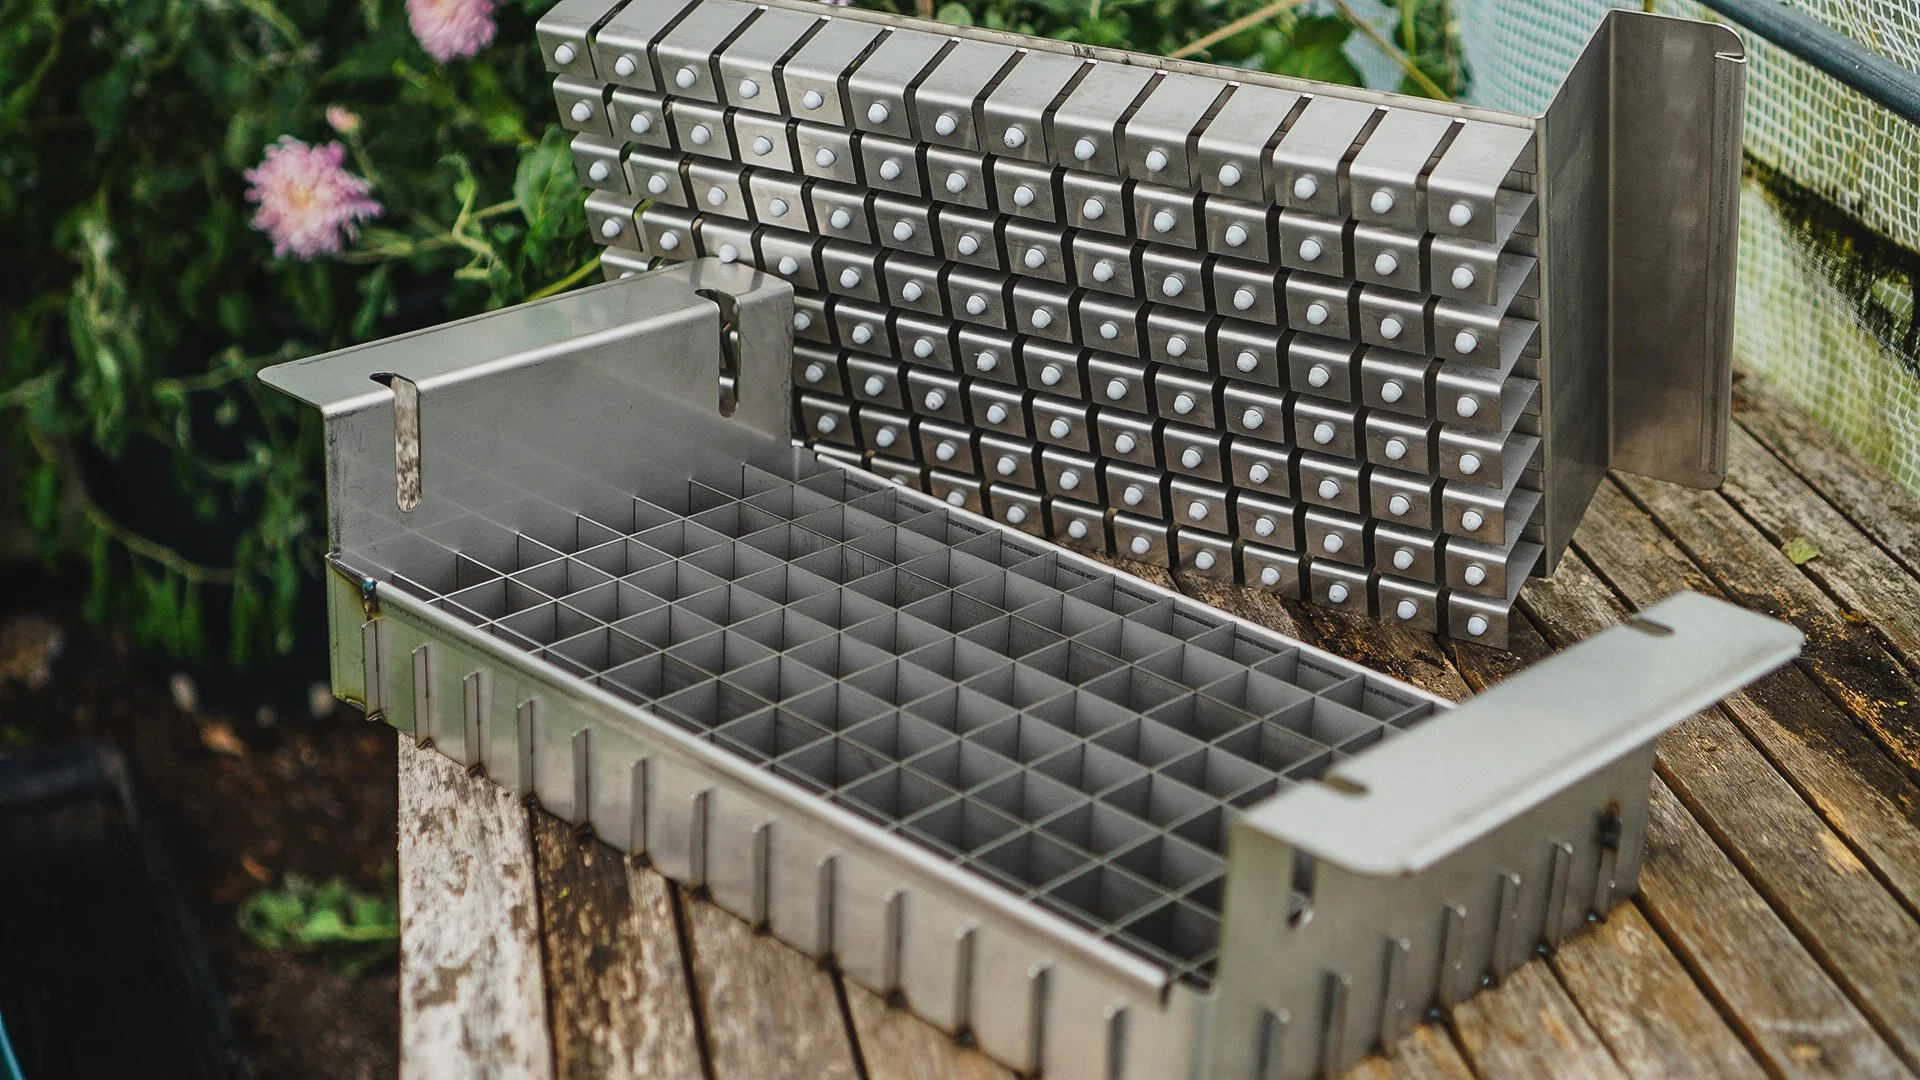
How to make soil blocks

1 - Sit the bottom tray of your soil blocker into another shallow tray - make sure the tray doesn’t have ridges or holes on the bottom. Catering trays, aluminium roast trays and garden trays work well.

3 - Option B - Place the top tray on the bottom tray and press down to make indents in the blocks with the dibbles

6- Push out seeded blocks - this ensures good seed to soil contact
Caring For Soil Blocks
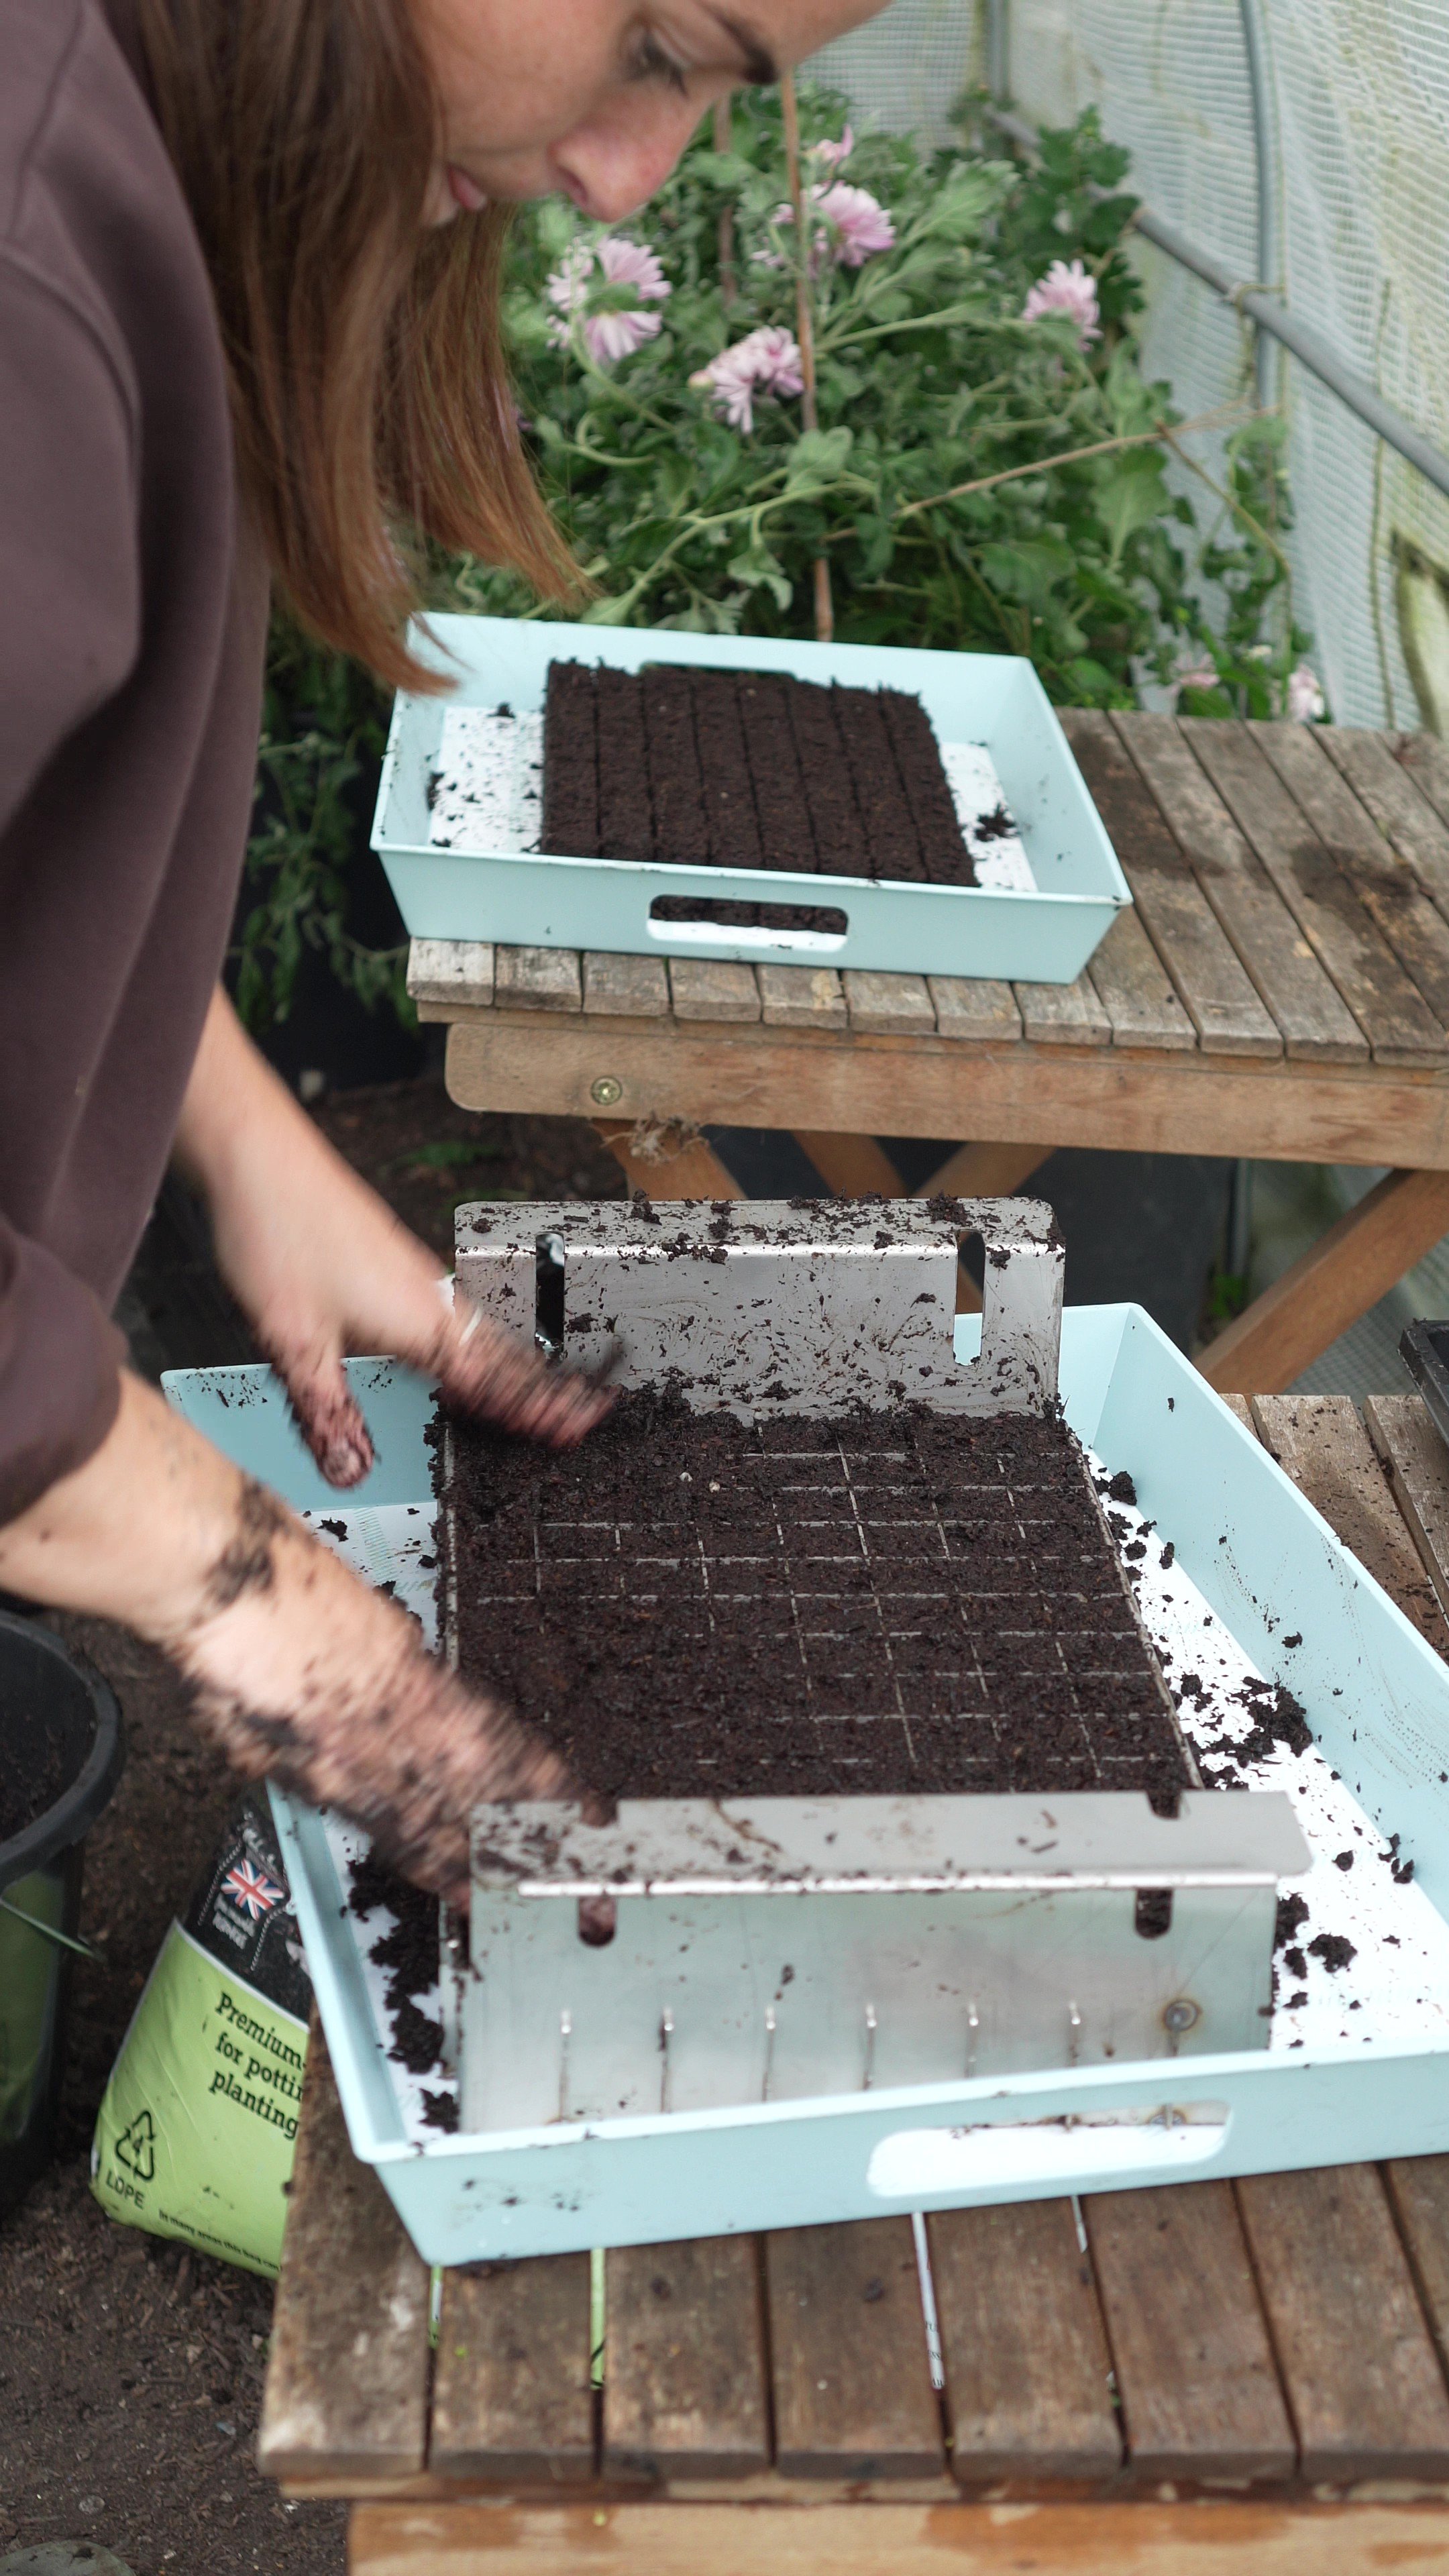
2 - Fill the bottom tray with compost, making sure its packed well into each cell.

4- Sow seeds in each cell

voila!

3 - Option A - Place the top tray on top and squeeze the handles together to push out the soil blocks.
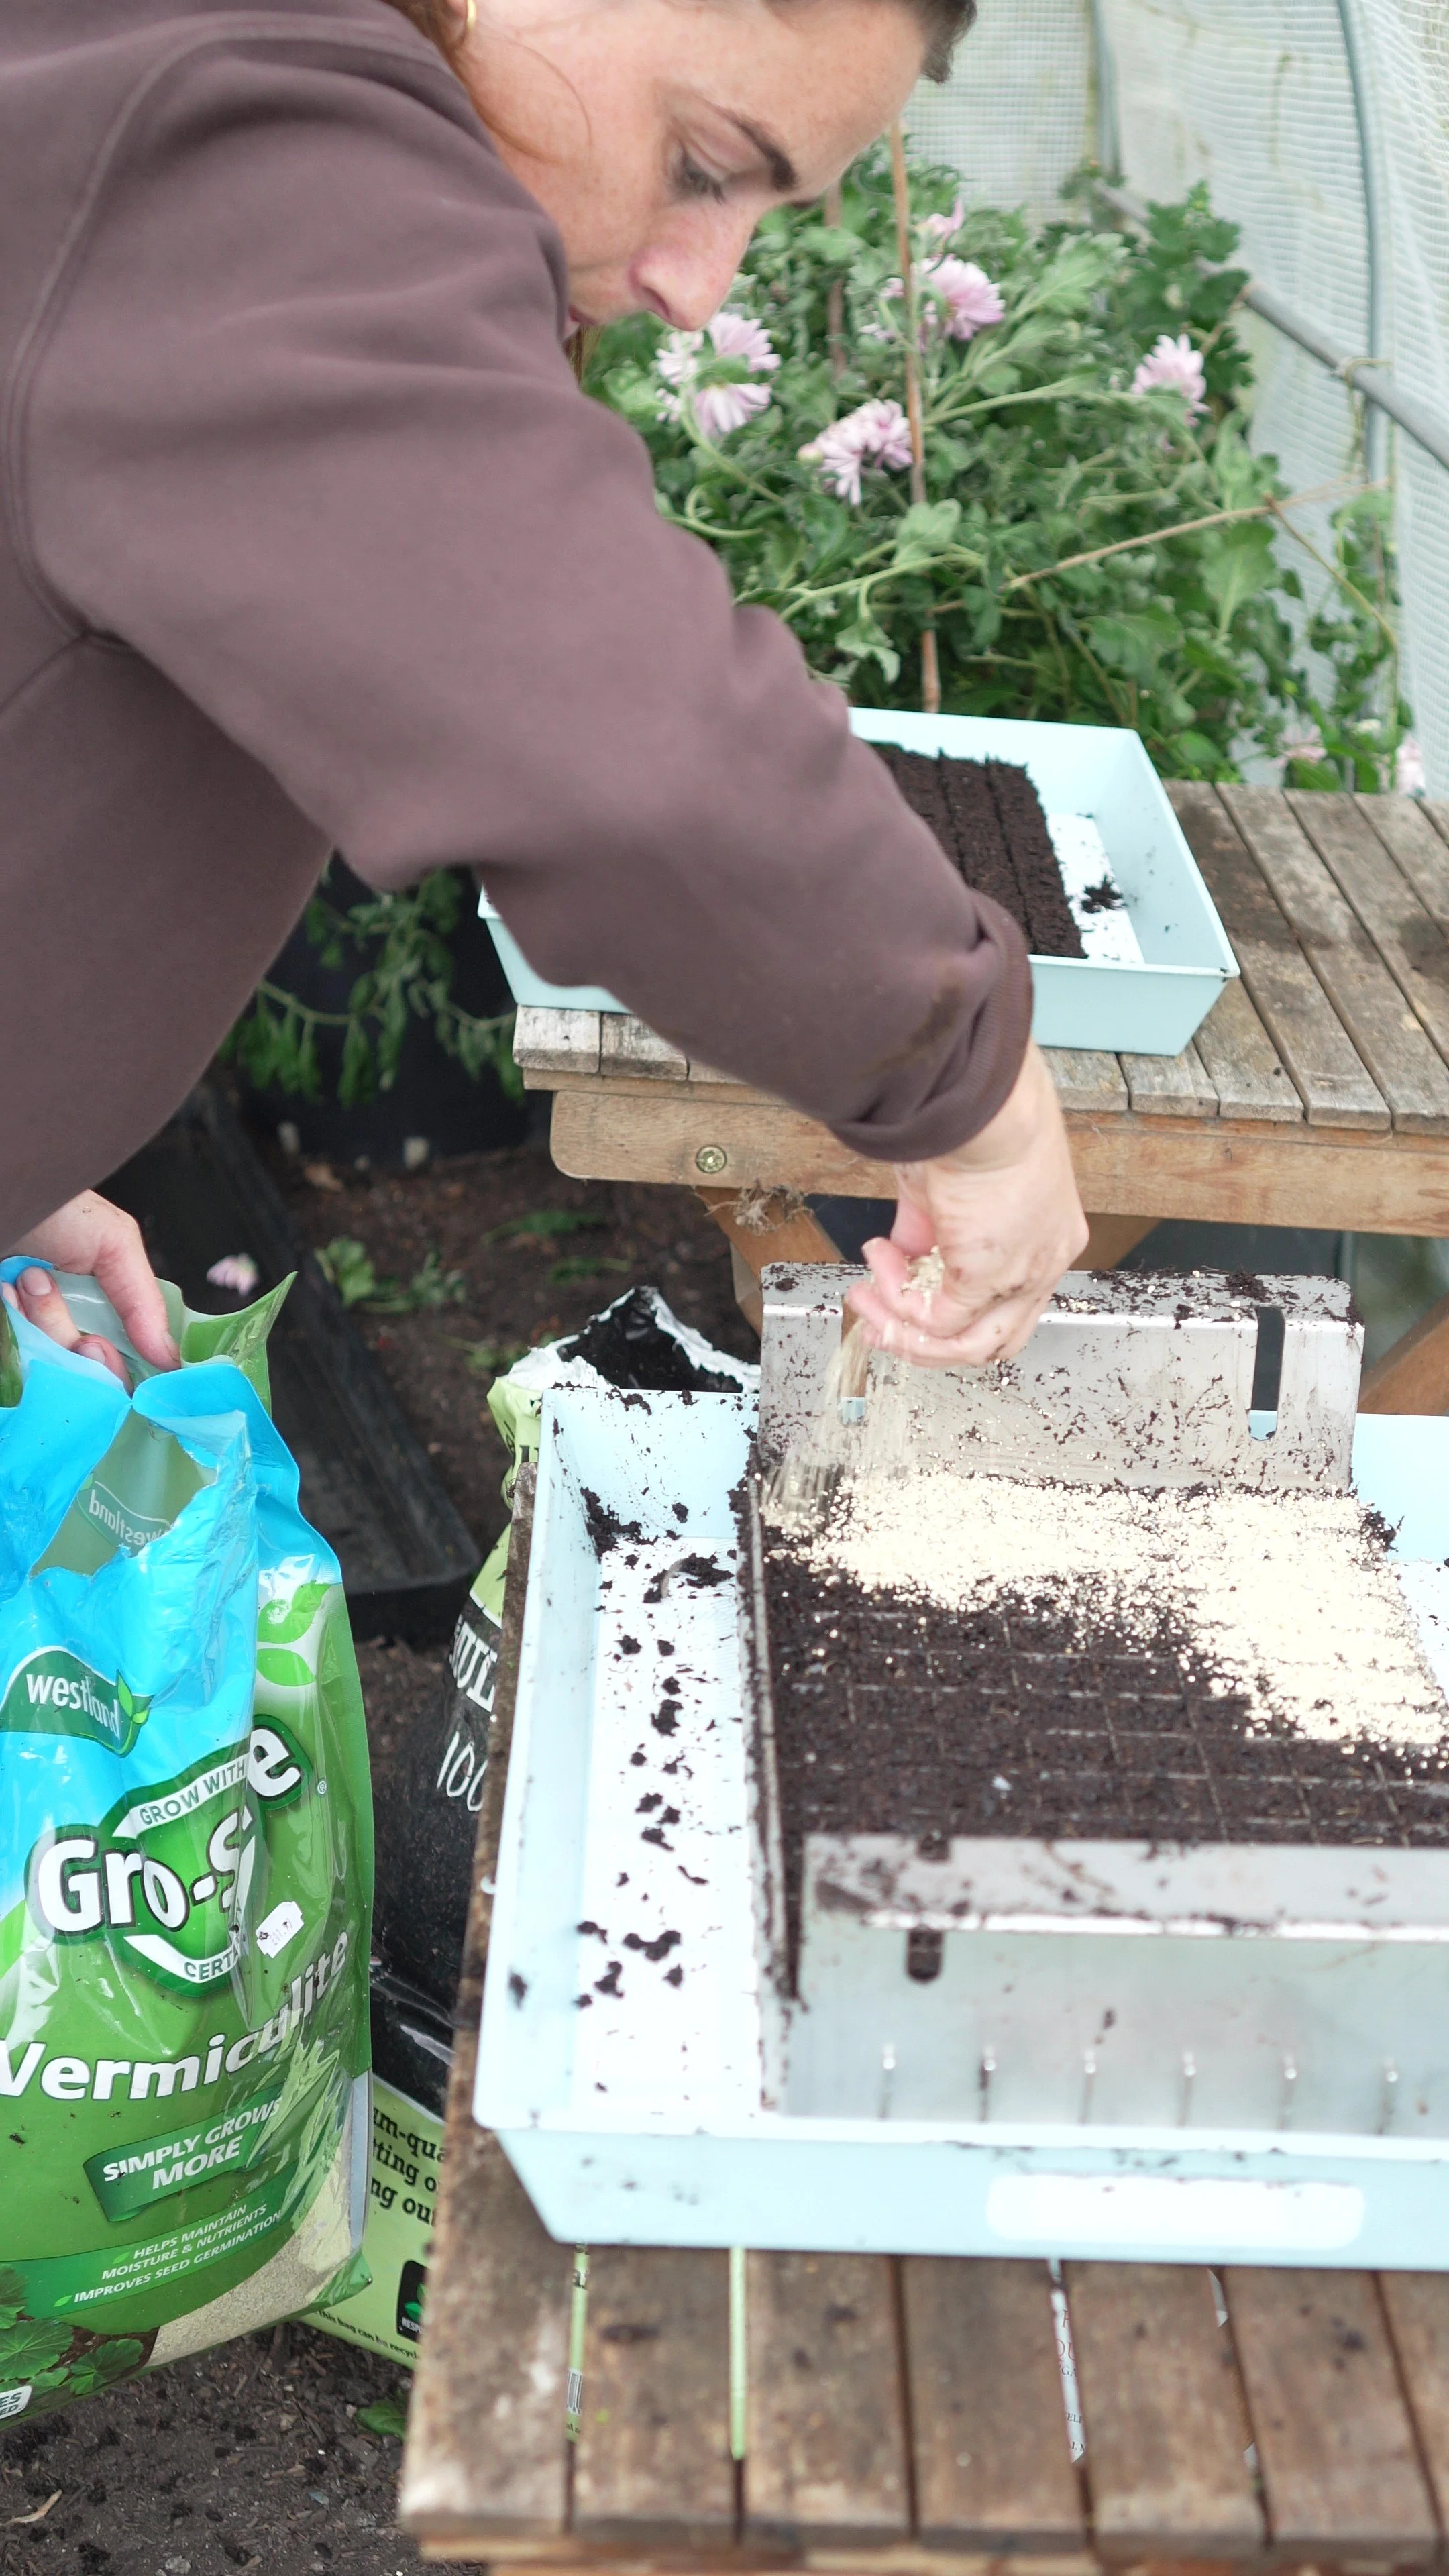
5 - Cover seeds with vermiculite

Top tip - have a brush or a shallow tray of water on hand to quickly clean your tray in between sets of blocks. A clean tool will push out clean blocks
Soil blocks should be carefully tended to ensure they’re not too dry or too wet. Use a jug or a watering can to pour water into the shallow bottom tray. If your surface isn’t level you might have to swirl the water around to make sure each block gets water. You can add little by little until everything looks moist enough, or pour in more water than needed and pour off the excess once the blocks look hydrated.