
Soil Blocking for Seed Starting: A Beginner’s Guide to Healthier Seedlings
Soil blocking is an increasingly popular method for starting seeds without plastic pots or trays. By compressing compost into free-standing cubes, seedlings develop healthier root systems and experience less transplant shock when planted out. This guide explains what soil blocking is, why it works, and how to start your own seedlings using this method.
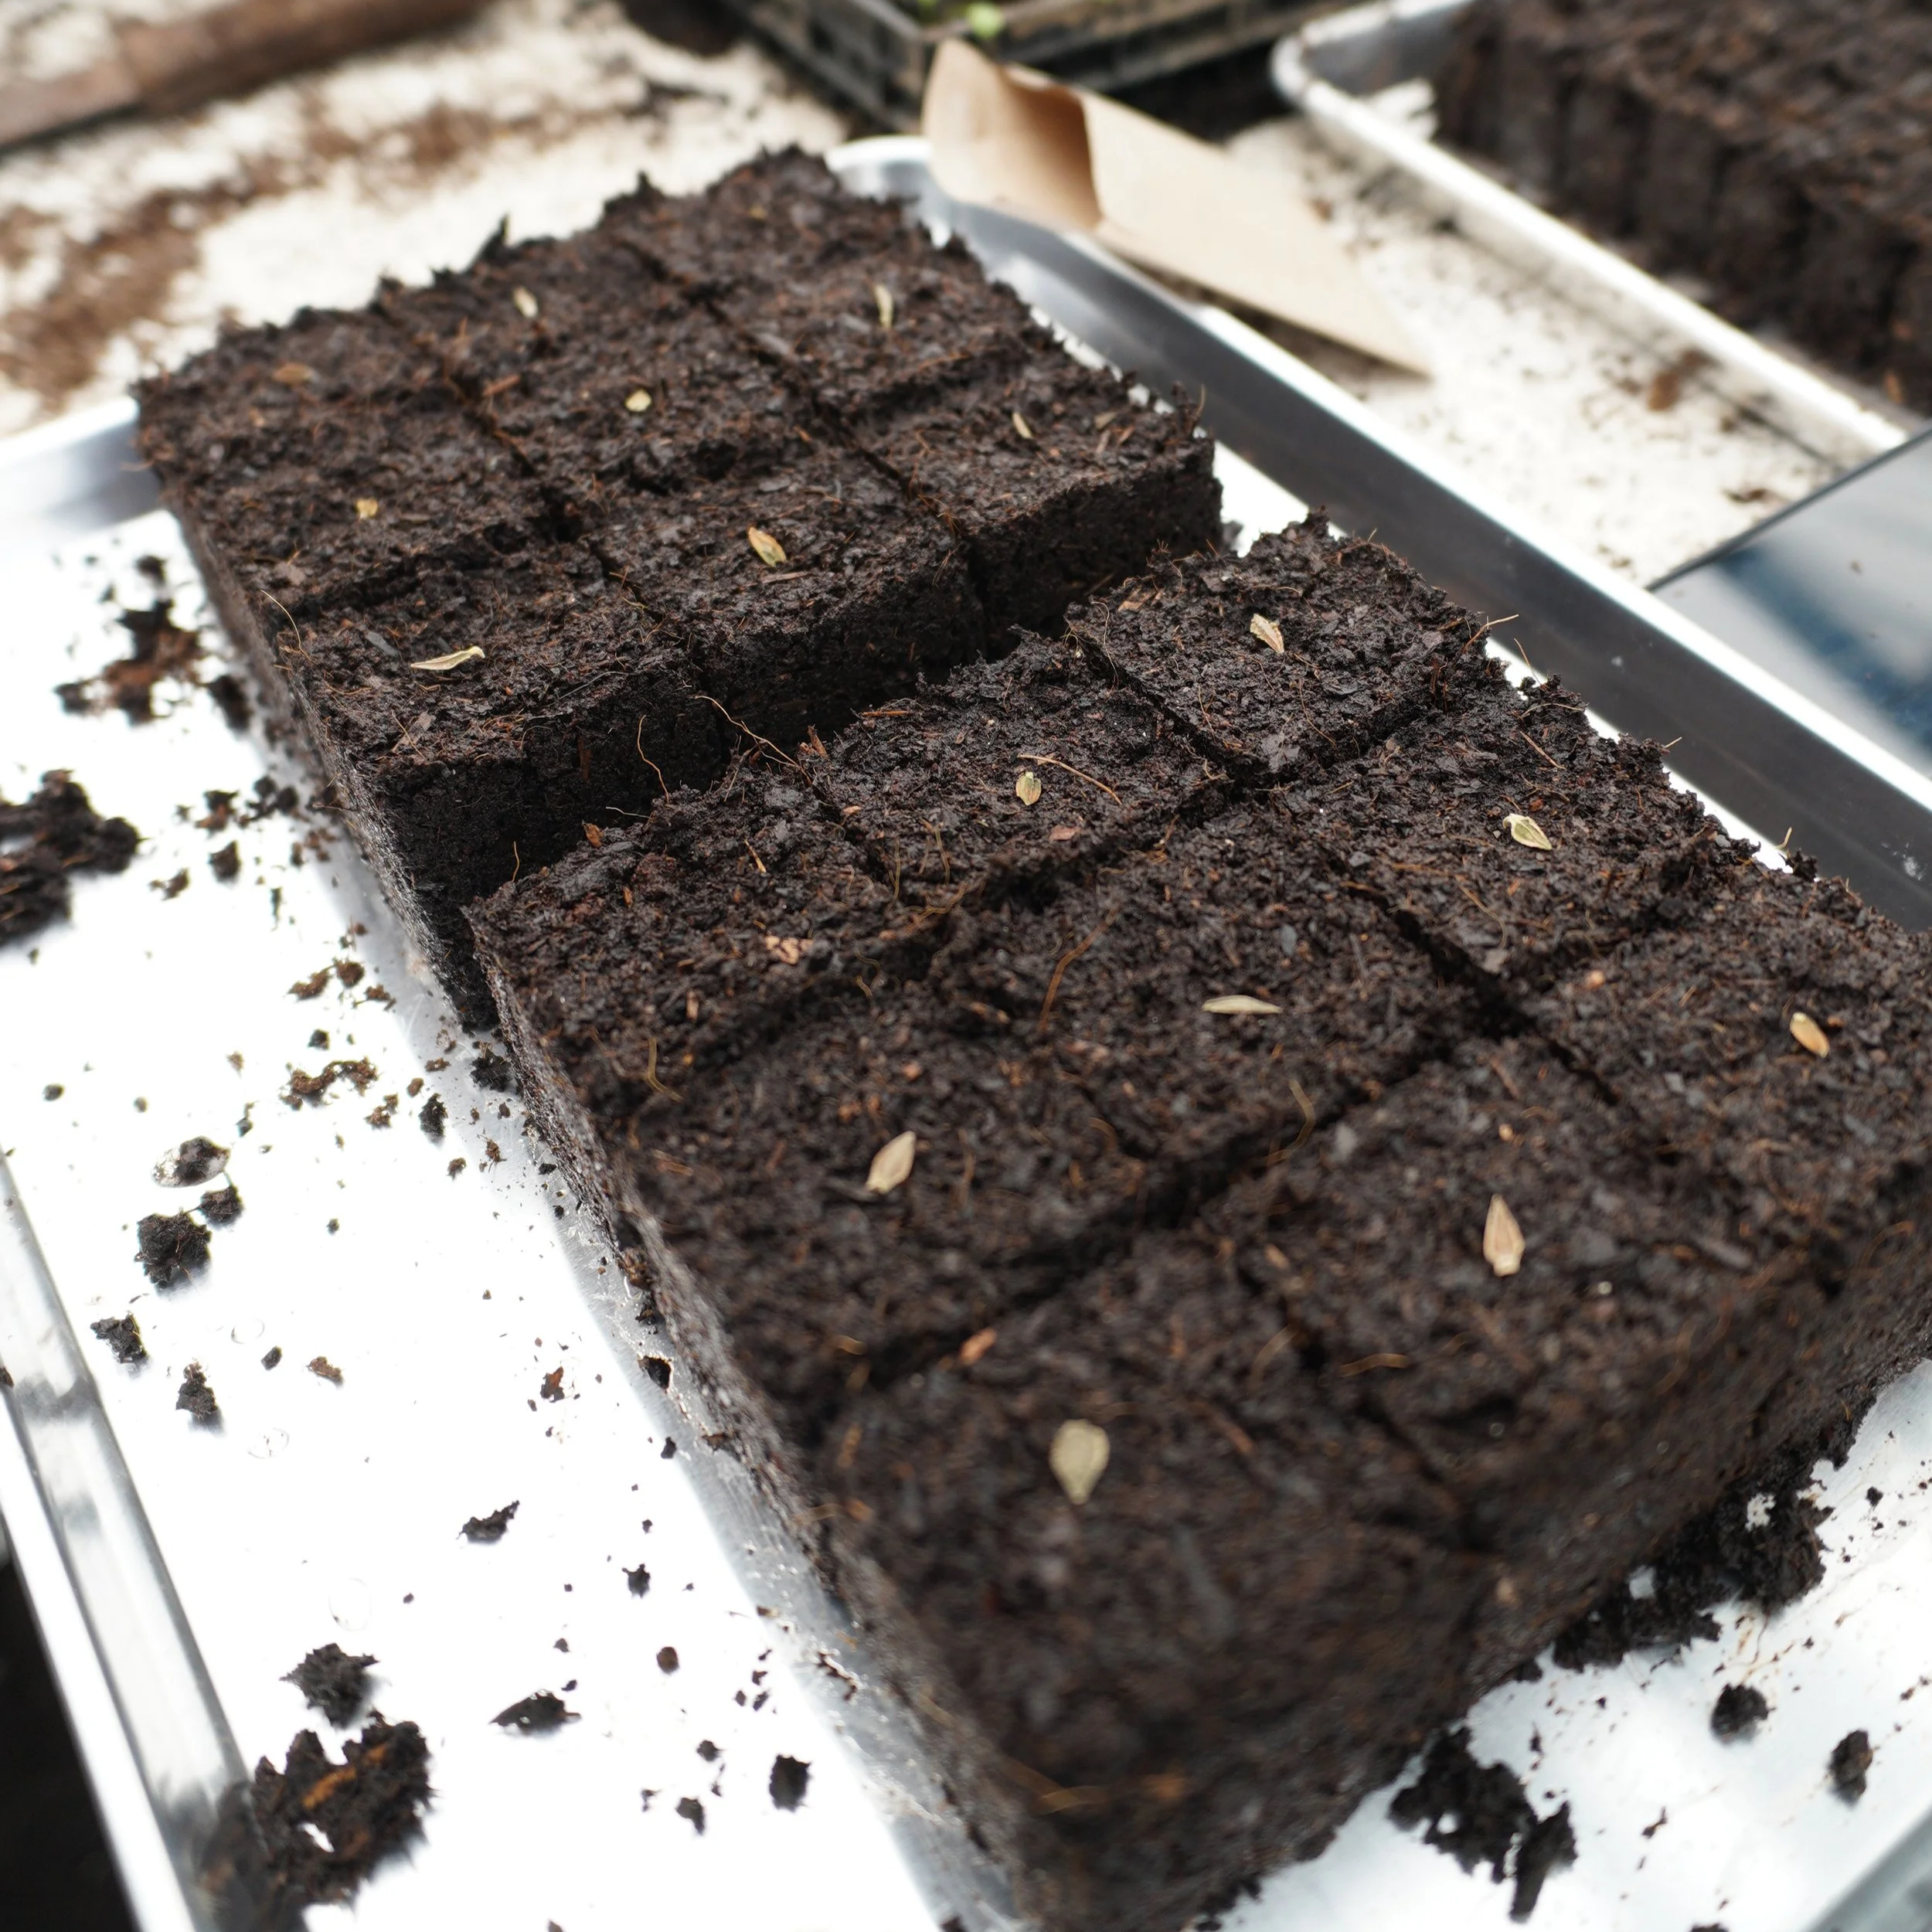
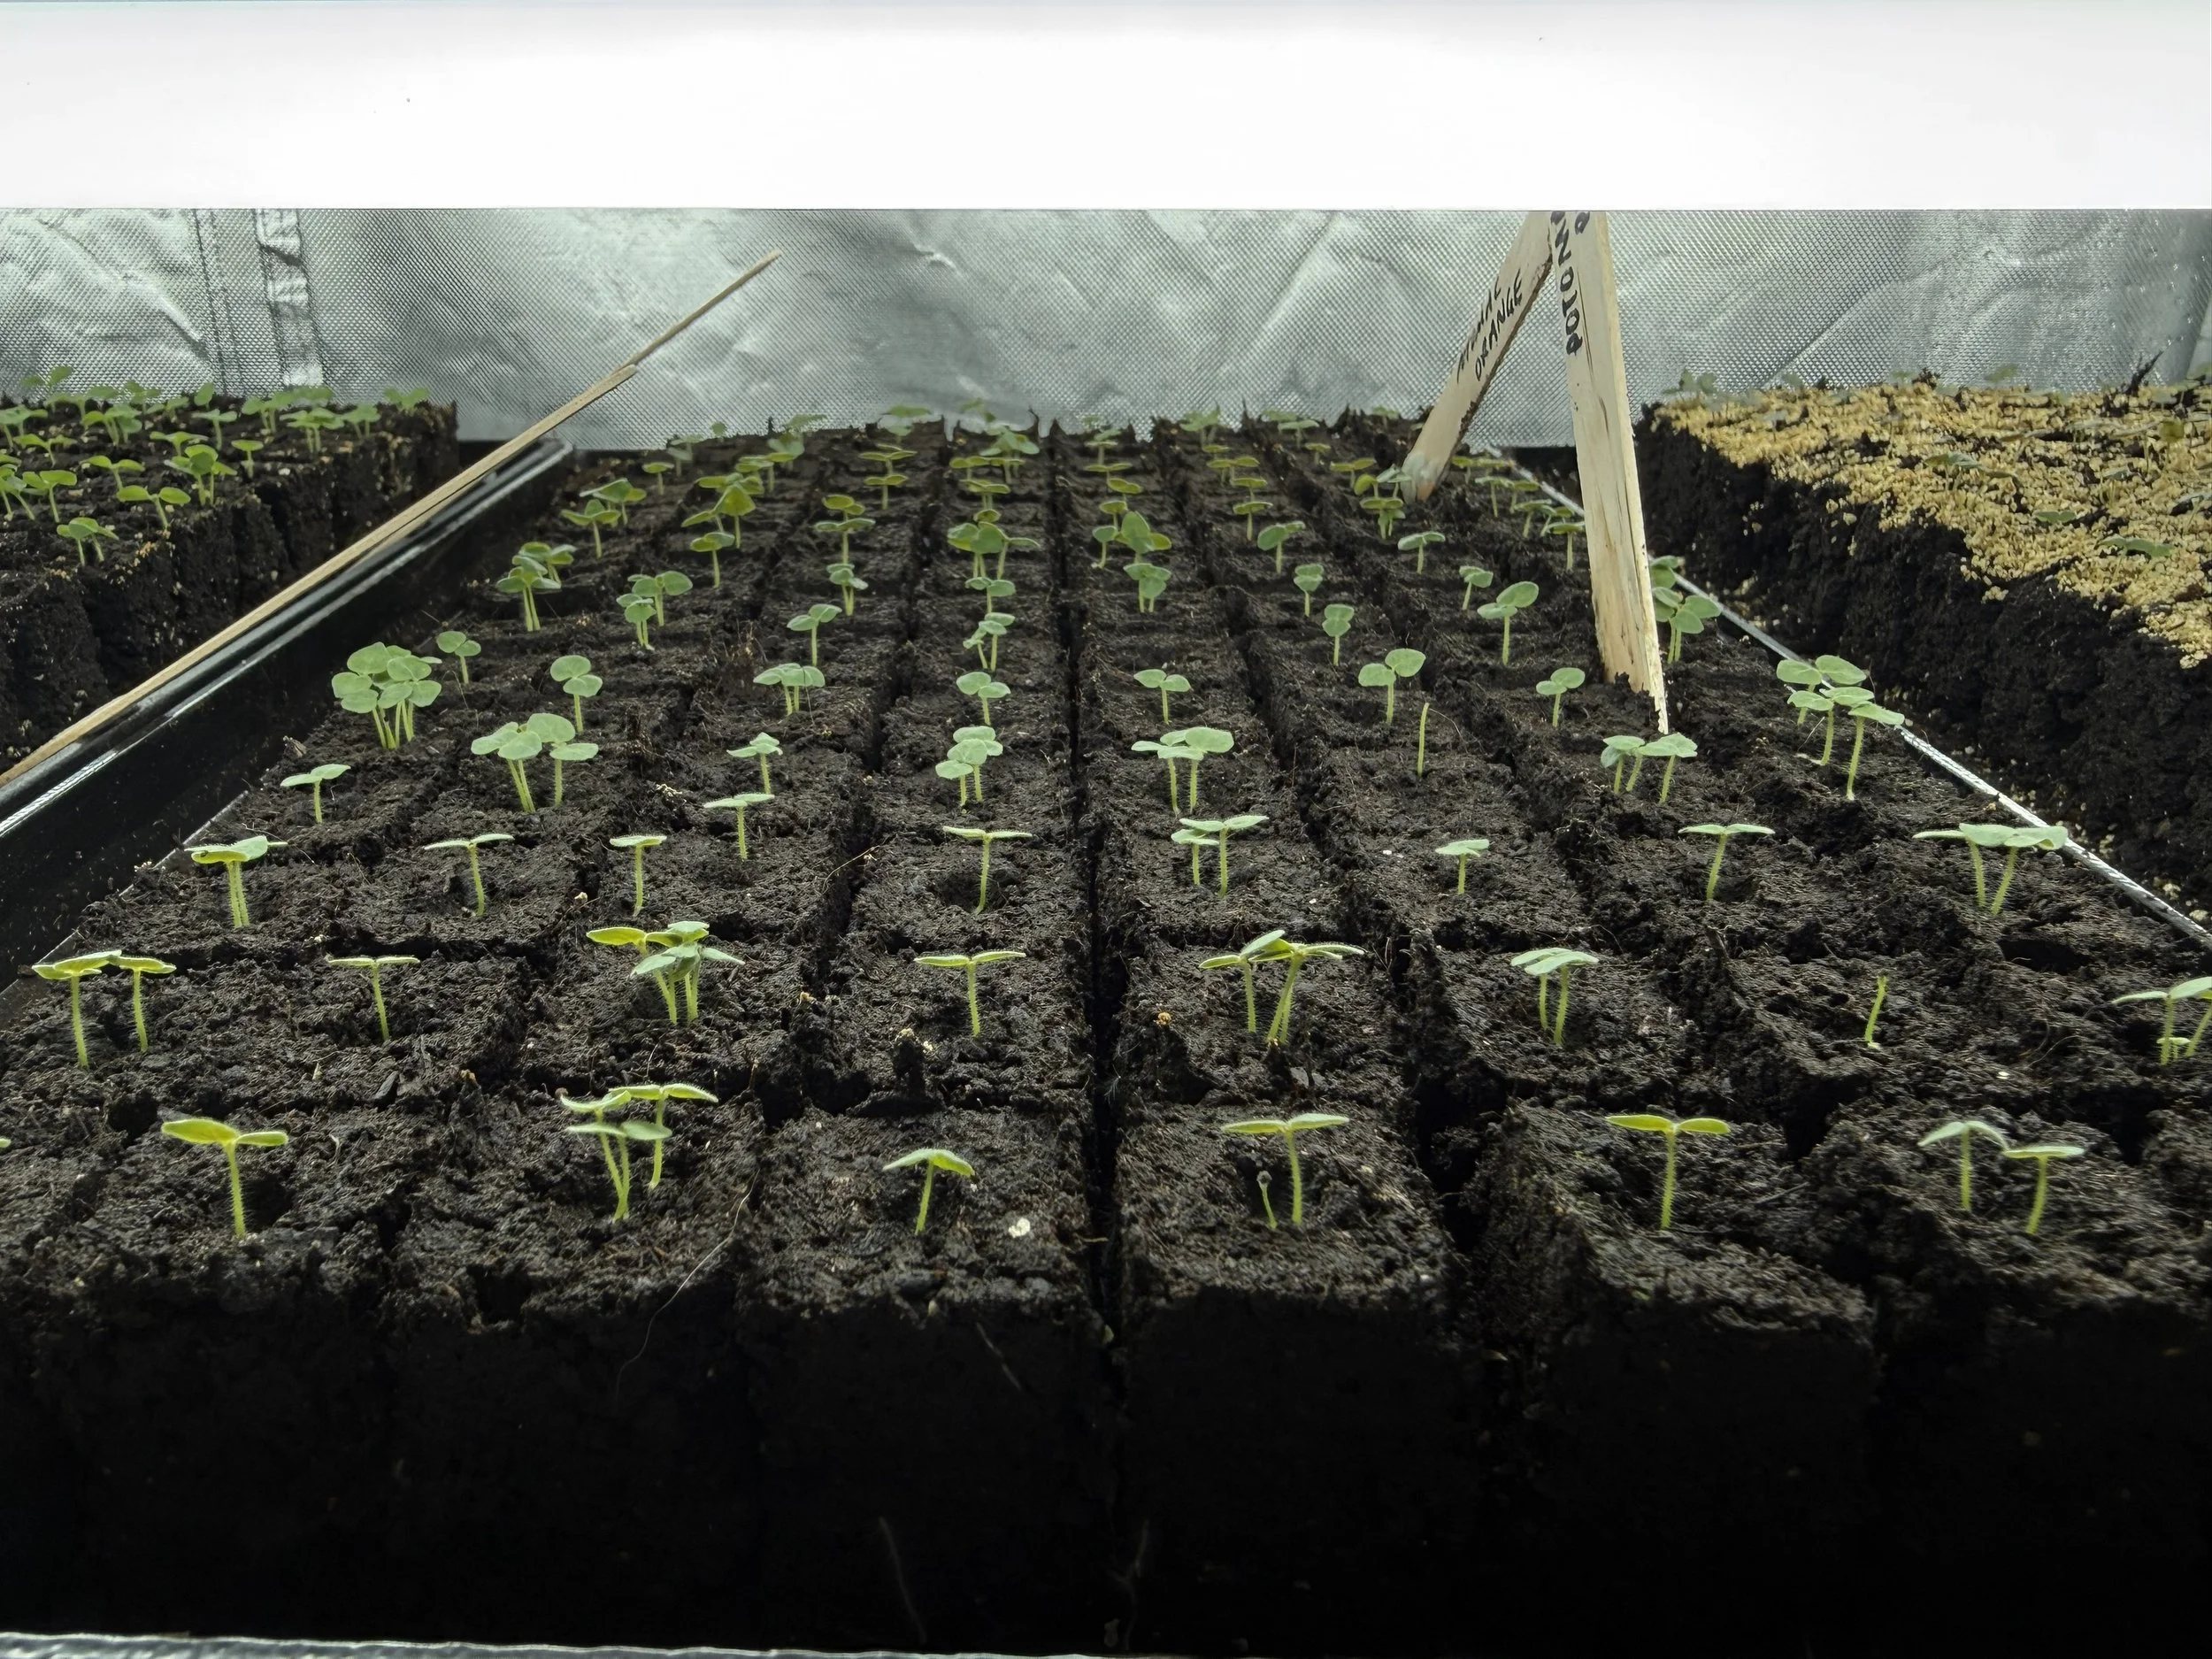
Zinnia seeds in soil blocks
In this guide:
Why soil blocking works
What soil blocking is
Benefits of soil blocking
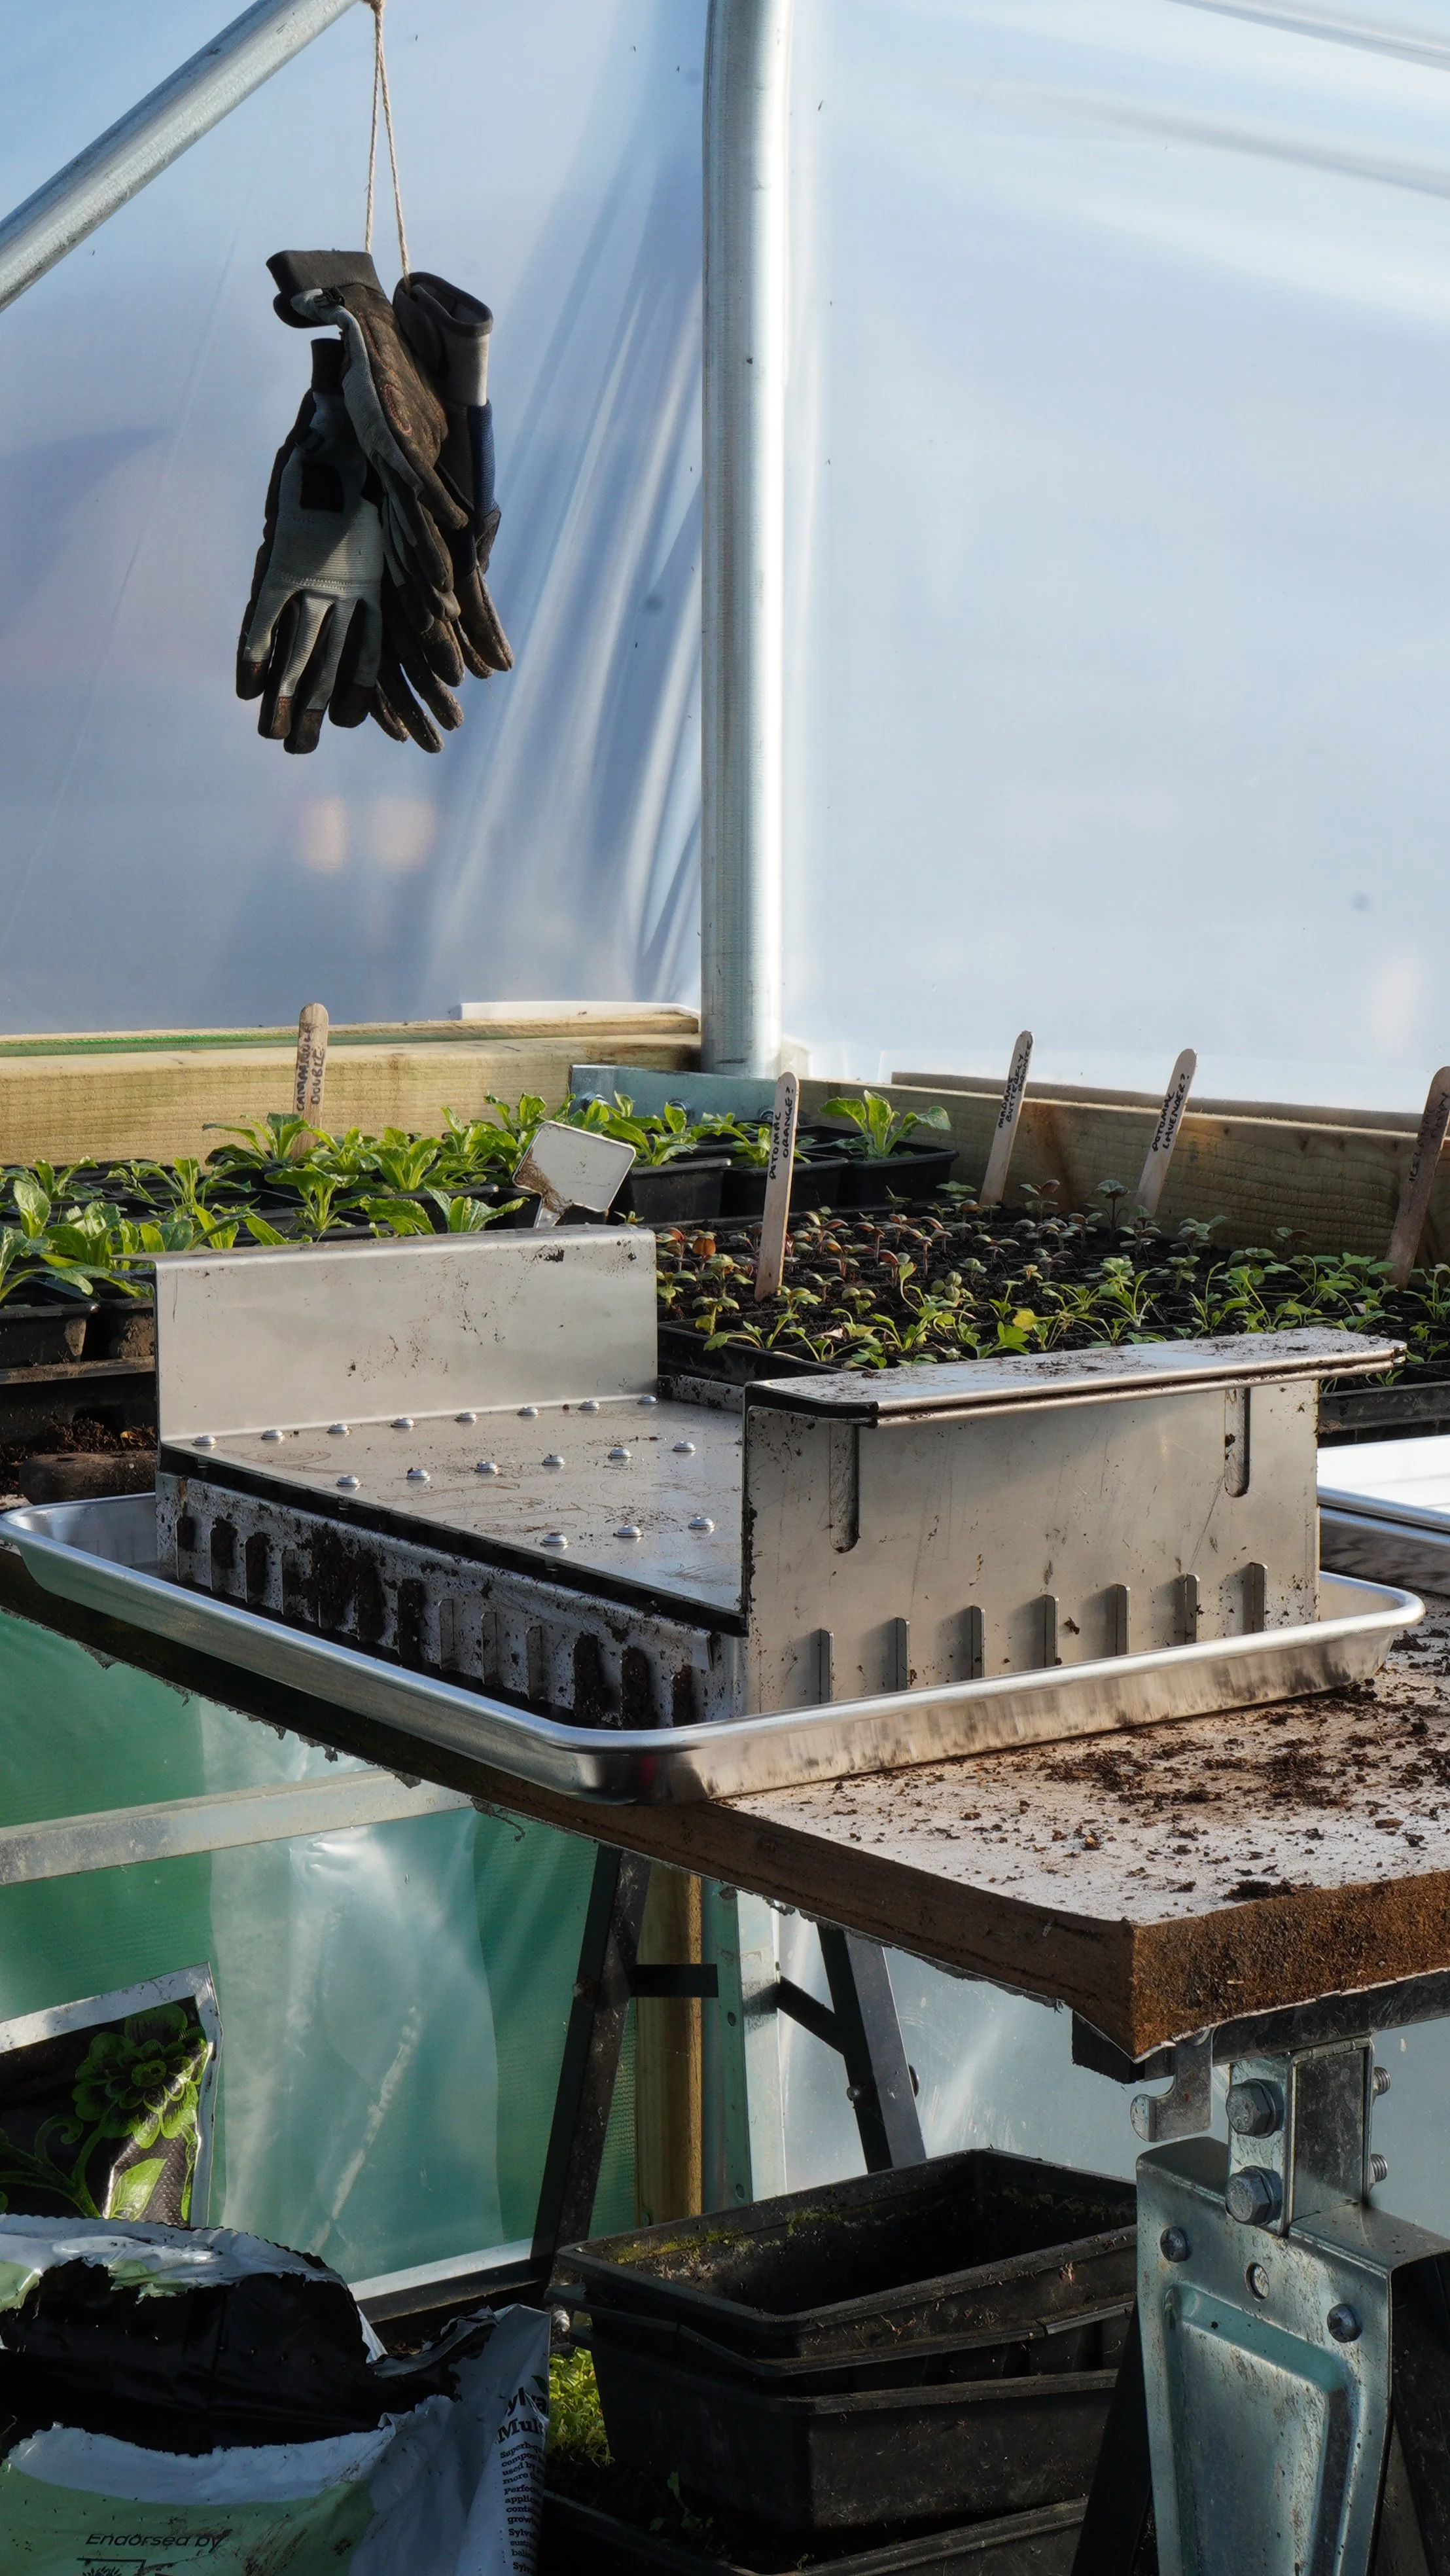
Soil blocking tools
Best soil mix
Step-by-step guide
Common problems
When to transplant
FAQs
Why Use Soil Blocking for Seed Starting?
Soil blocking has become a popular method for starting seedlings because it solves several common problems caused by growing plants in plastic pots. Instead of using containers, soil blocking creates compressed, free-standing cubes of compost ready for sowing seeds.
Plastic pots and trays can cause seedlings to become root bound, which often leads to transplant shock when plants are moved into the ground. They also tend to break easily, creating unnecessary plastic waste in the garden.
By eliminating plastic containers, soil blocking encourages healthier root development and produces stronger transplants. For this reason, many professional growers rely on soil blocking as a simple, sustainable way to raise seedlings.
What is Soil blocking?
Soil blocking is a method where compost is compressed into cube-shaped blocks using a soil blocking tool. The soil blocks are placed onto a shallow tray which can be filled with water to keep the blocks watered. Seeds are sown directly onto the blocks. The plant grows and the roots fill the cube of compost. The roots are air pruned when they reach the air at the edge of the block, they stop growing outwards and produce a more dense, fibrous root system instead. Soil blocking produces stronger seedlings which experience reduced transplant shock and no root circling.
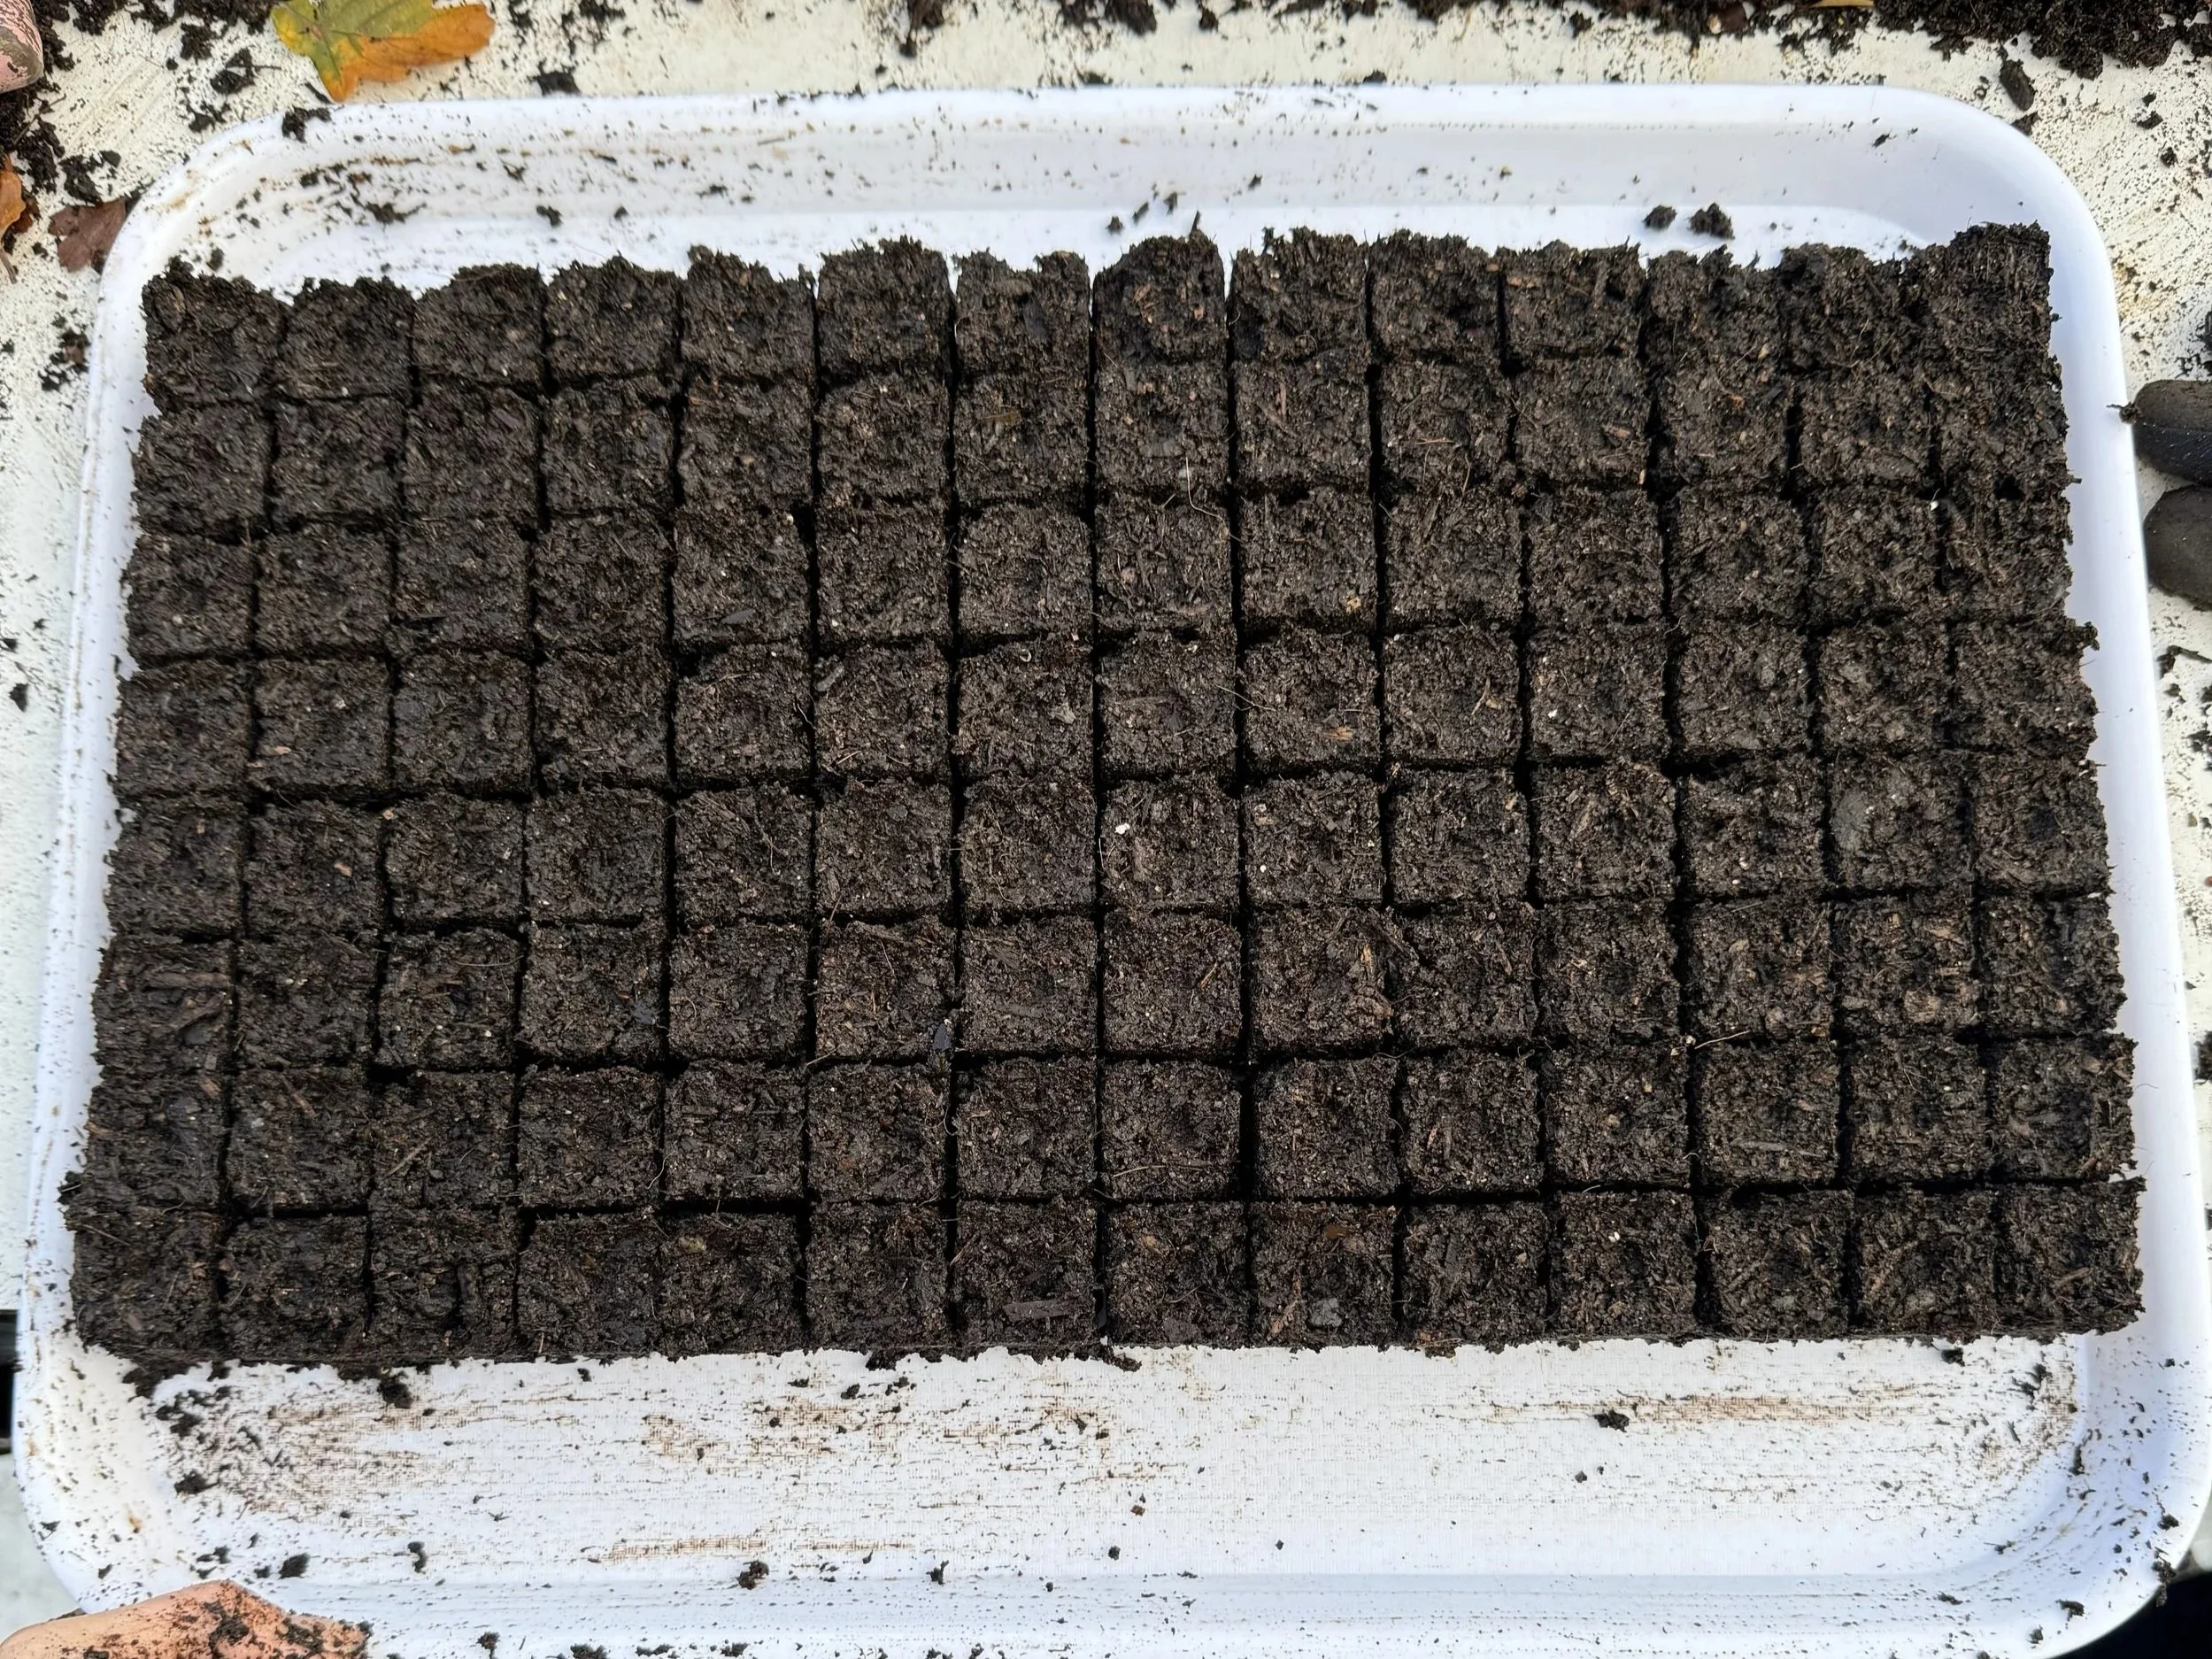
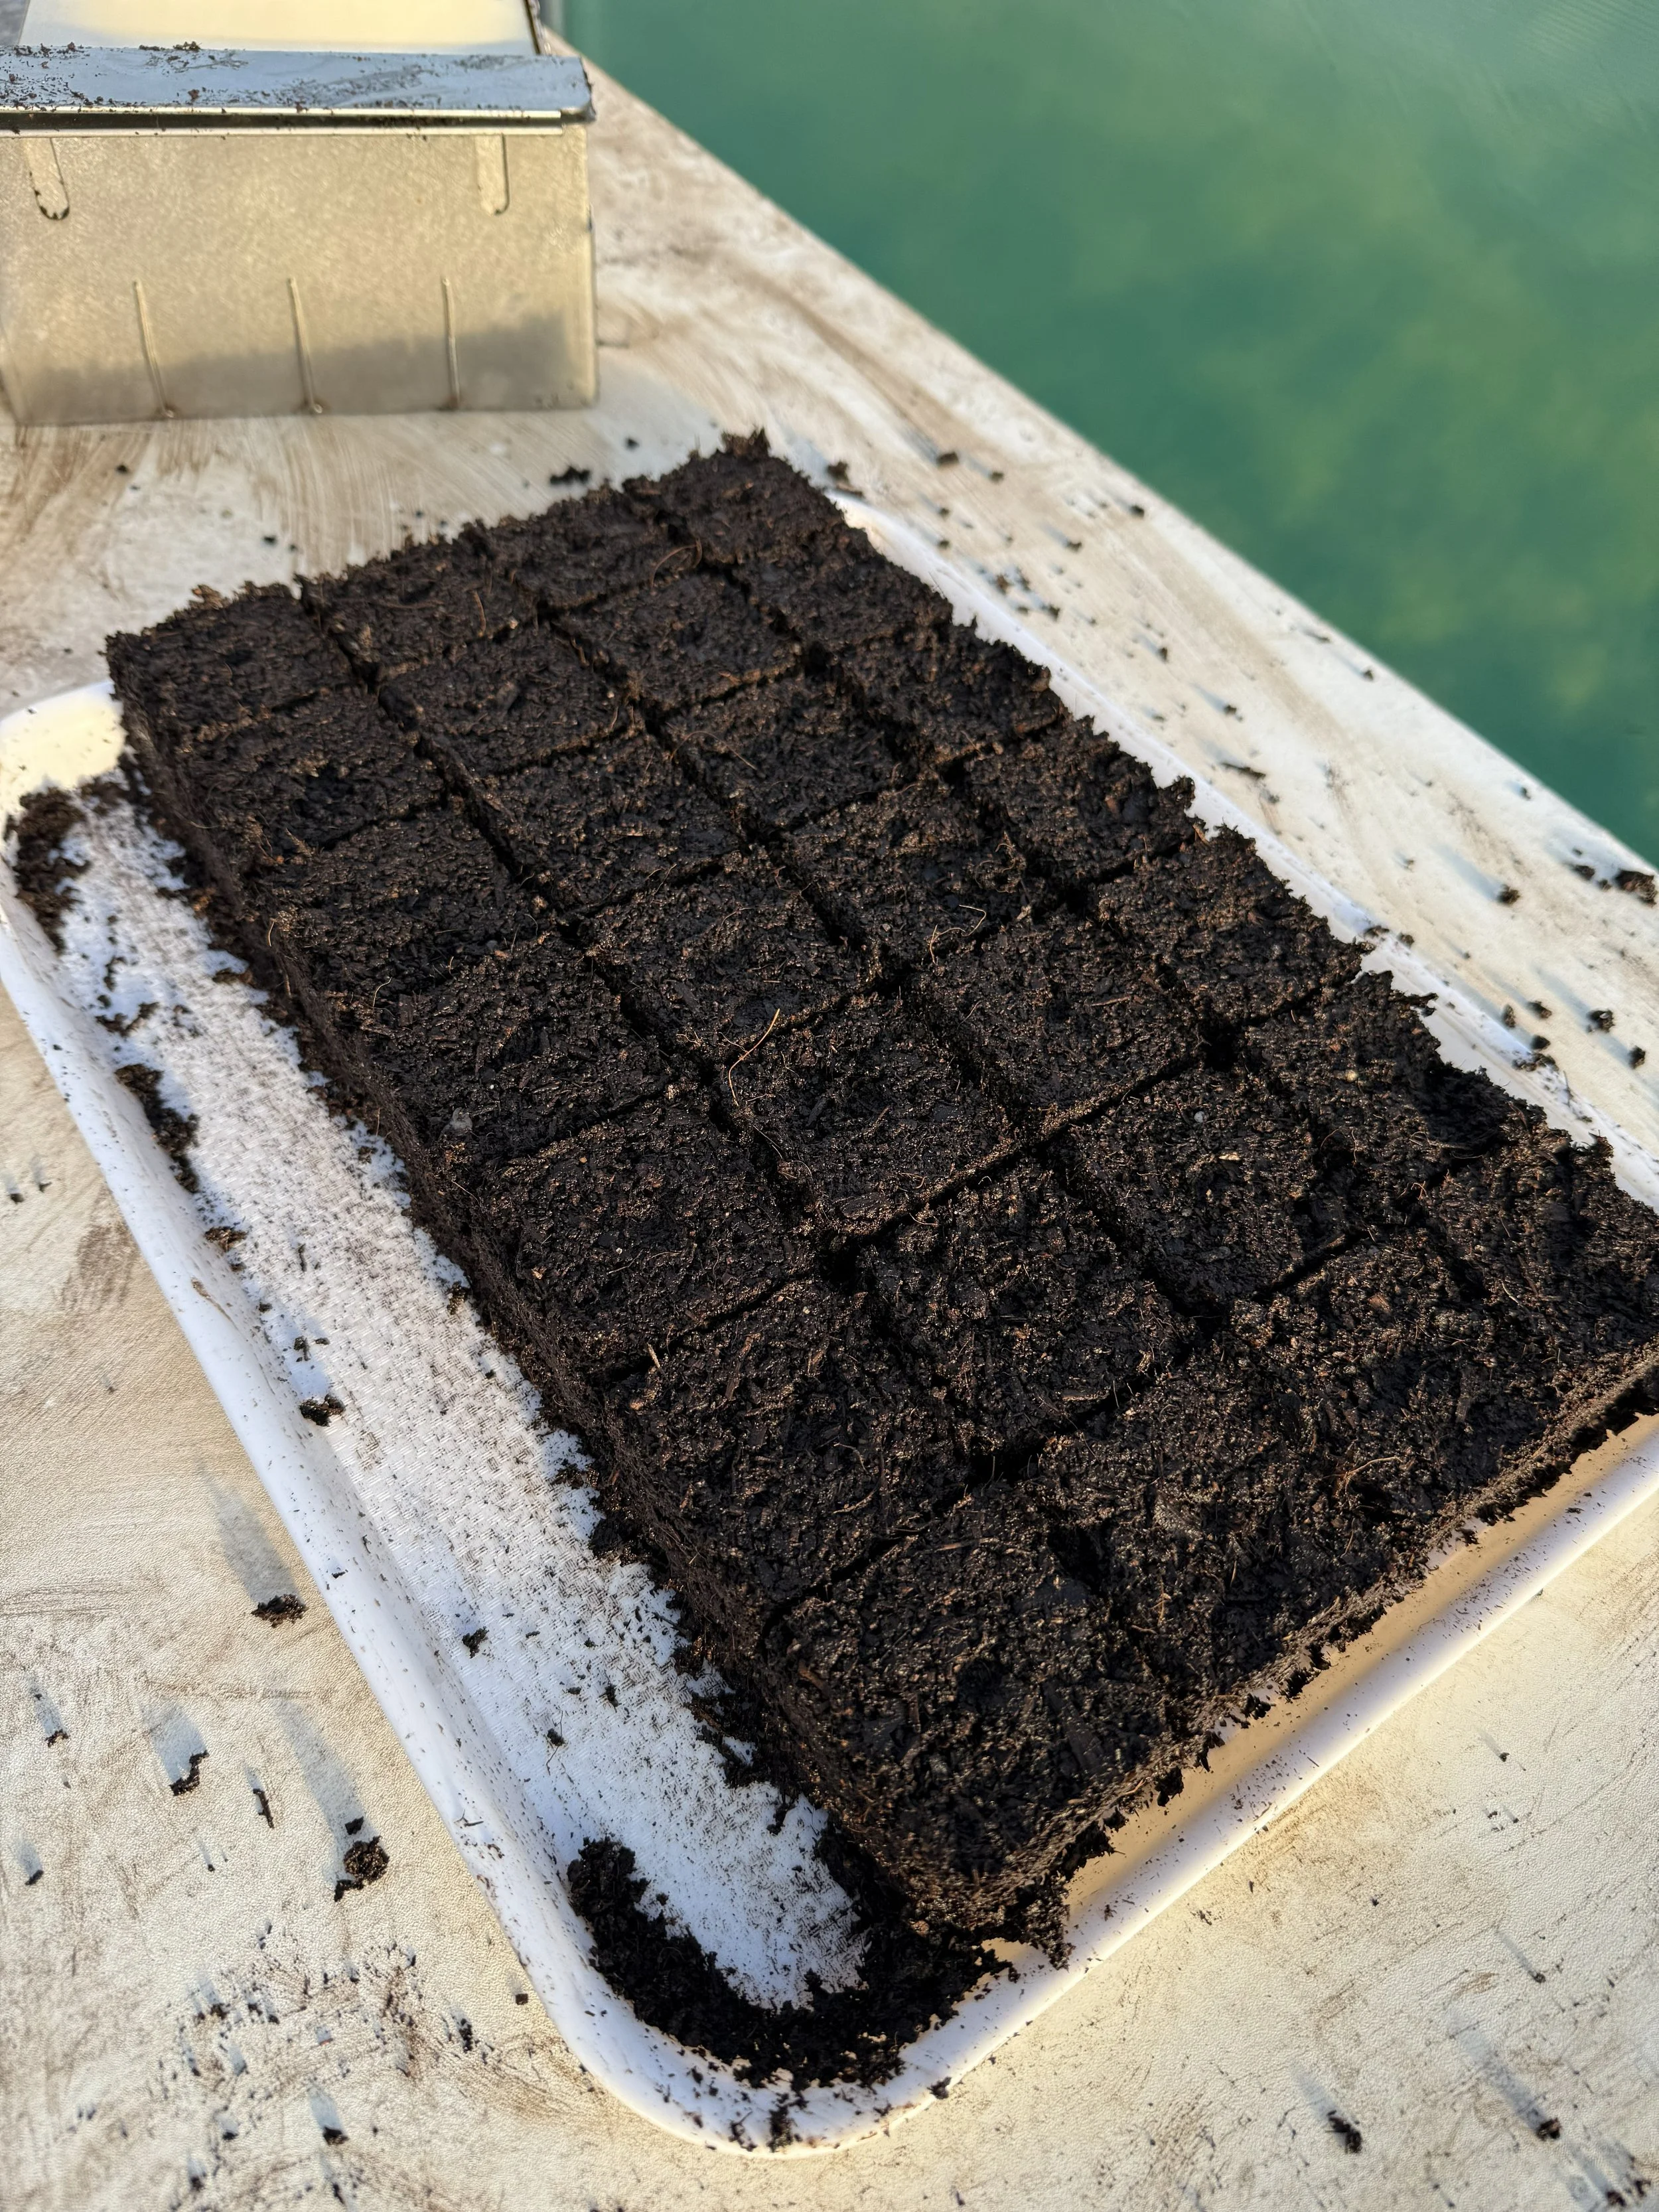
Freshly made soil blocks, ready for sowing seeds.
Benefits of Soil Blocking for Seedlings
Soil blocking solves a lot of the problems caused by growing in pots. Here’s how:
Prevents Root Binding
Root binding is where plant roots completely fill the container they’re in, spiralling around the edge of the pot and replacing all of the compost with root matter. This results in dehydrated and malnourished plants as there is little compost to create structure for air flow, and retain water and nutrients for healthy plant growth. You can usually tell if you have root bound plants if you see roots coming out of the bottom of pots, yellowing leaves and stunted growth.
Soil blocking encourages air pruning which is where a root tip will reach the edge of a soil block, stop growing and trigger the plant to create a denser, more fibrous root system. Roots cannot become pot bound in soil blocks.
Eliminates the need for plastic pots
Plastic pots created for gardeners are often made from vaccuum formed plastic. These thin plastic trays and cells often break after a season or two. This results in unusable pots and trays that need to be thrown away and replaced. Soil blocking relies on a single shallow tray to place the blocks onto, which can be made from stronger, longer lasting plastics or aluminium which lasts an extremely long time and is more easily recycled.
Reduces transplant shock
Transplant shock occurs when a plant experiences stress while being transplanted into the ground. This can be caused by root damage, water loss or changes in environment. Seedlings grown in pots often have spiralled roots which are easily damaged when taking them out of the pot.
Soil blocking reduces transplant shock by allowing the roots to remain in tact within the soil block. Leaving them to simply grow outwards into the surrounding soil once planted. As long as the soil blocked seedlings are well hydrated and hardened off before planting they will have no problems adapting to their new environment.
Speeds up planting out
Soil blocking makes planting out much quicker when you can just reach for a block and pop it into the soil. I use a hori-hori knife to move the soil to one side. I sit the soil block into the hole so the plant is at soil level, then push the soil back around the soil block.
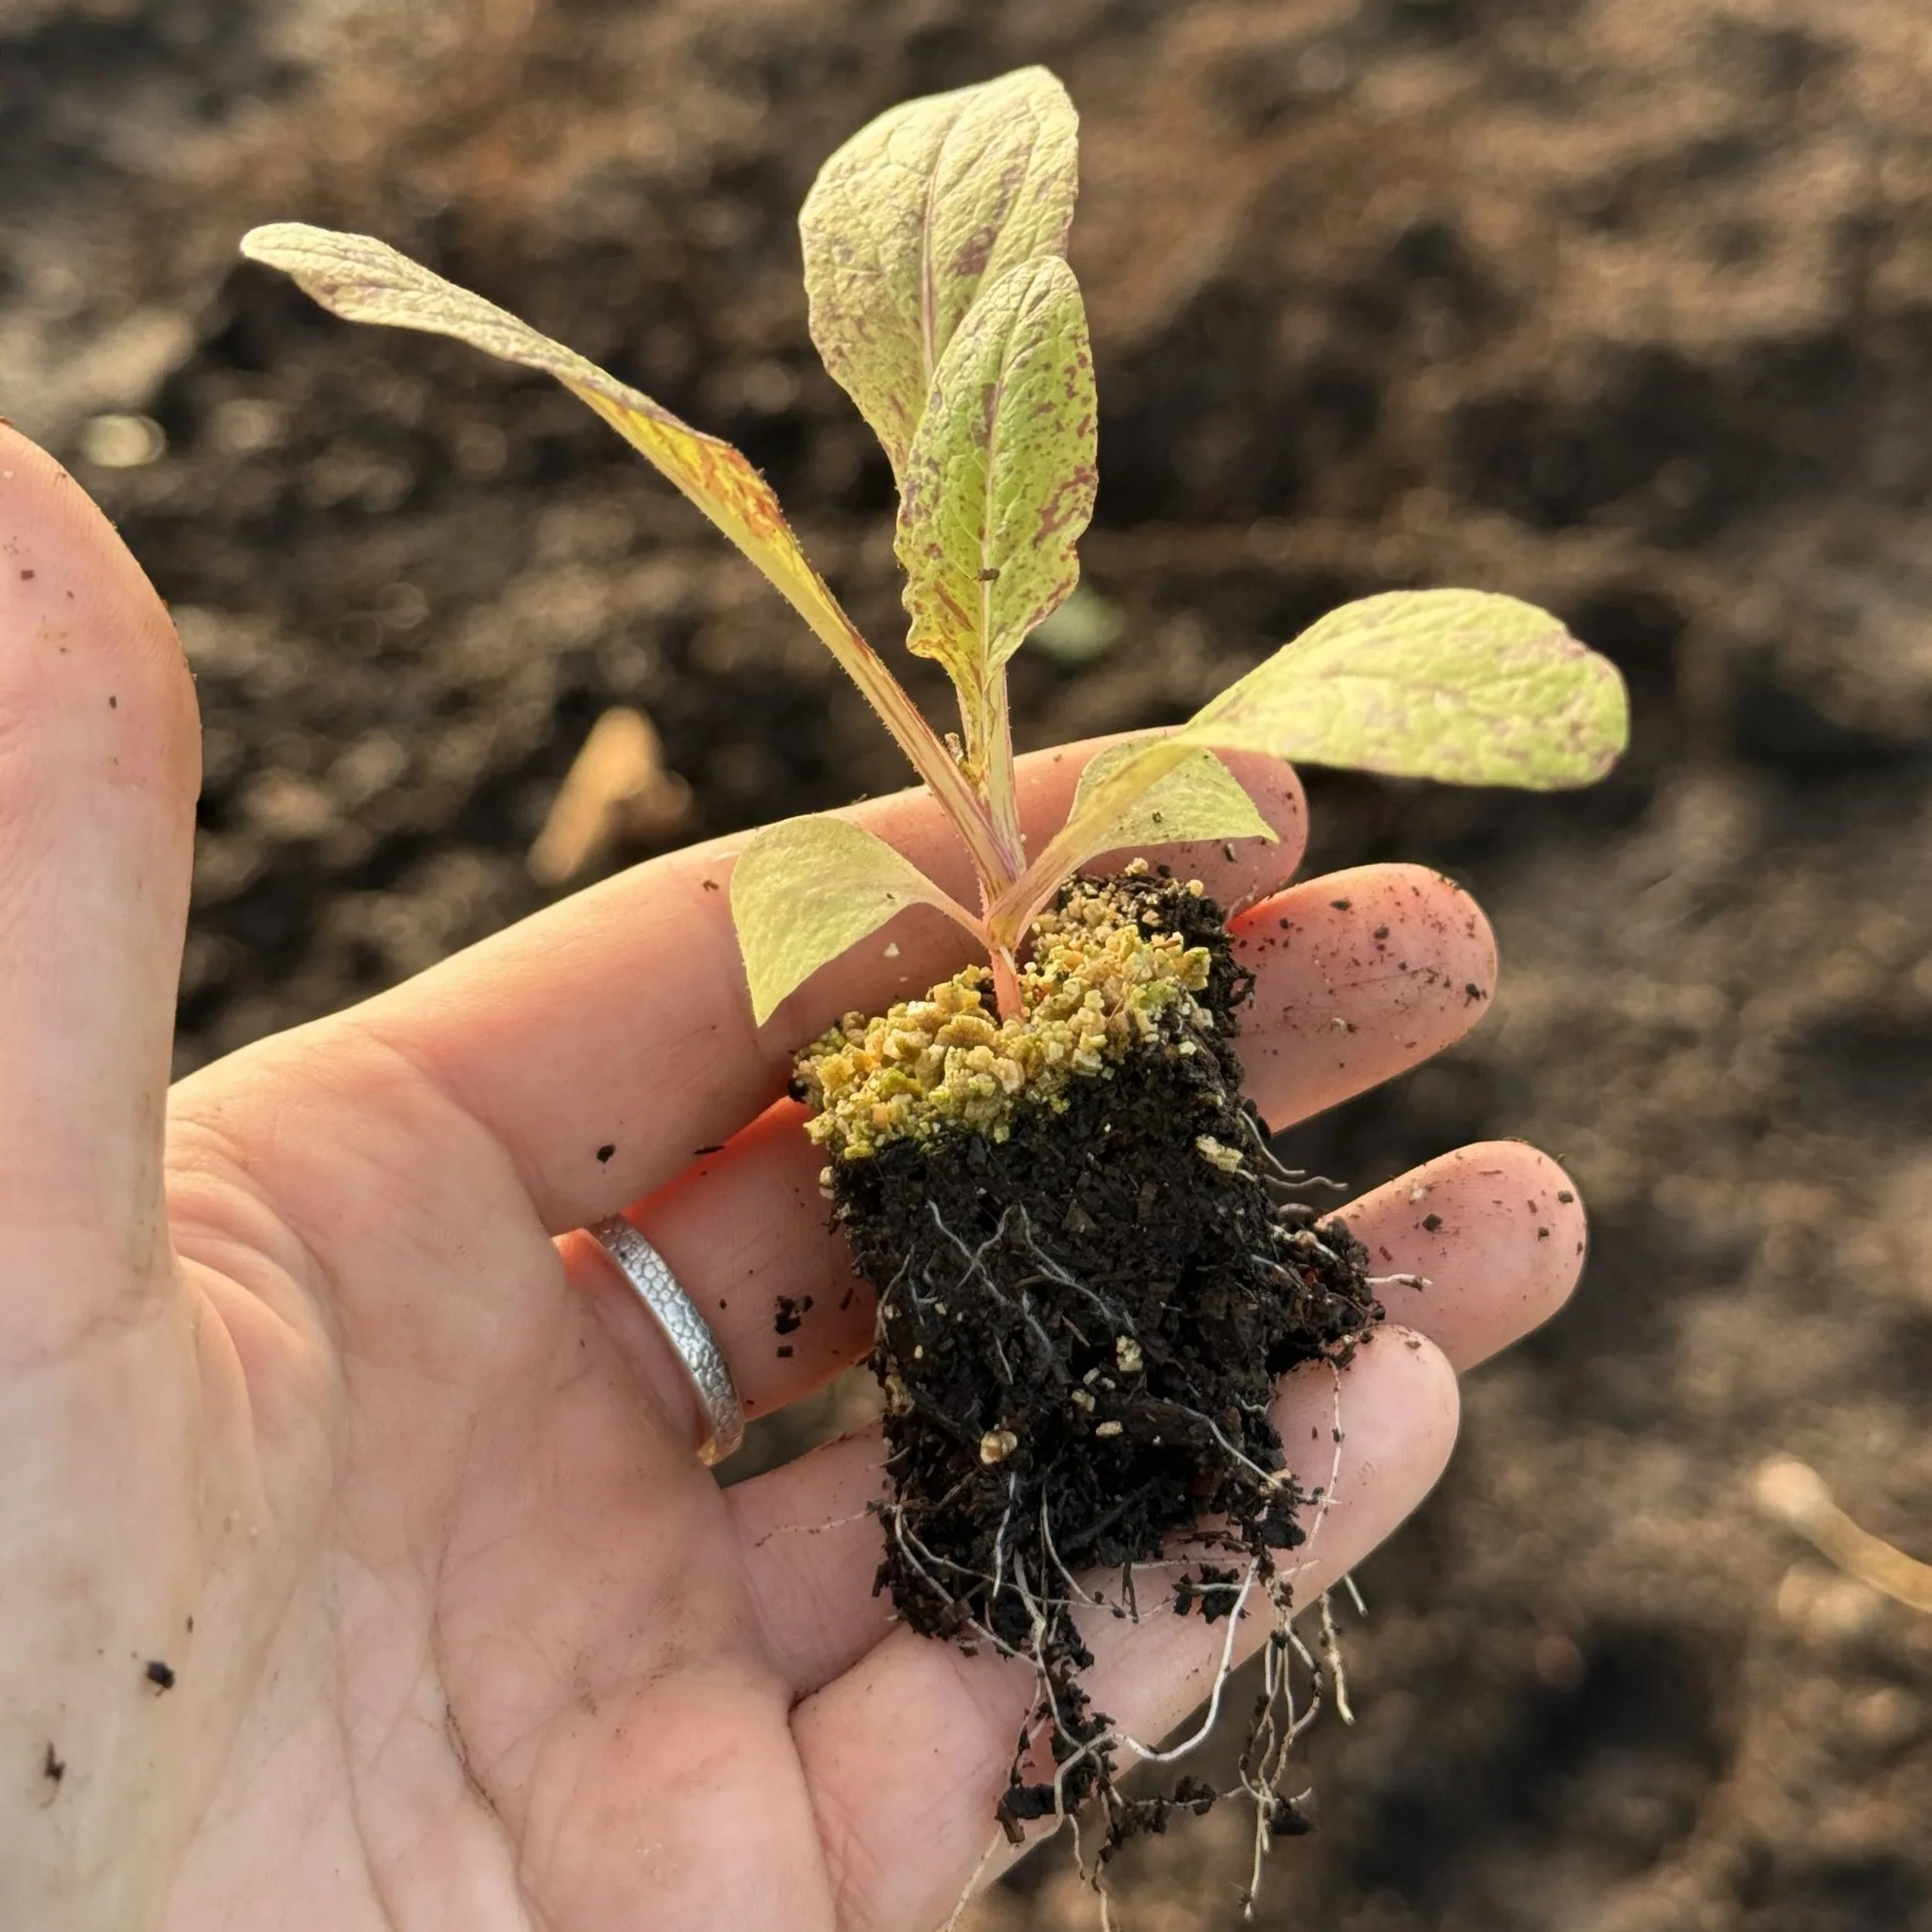
Lettuce seedling in a soil block ready for transplanting
What You Need to Start Soil Blocking
Essential Tools
Shallow tray for blocks to sit on
Seed starting mix
Mixing tray or bucket
Watering can or Jug
Best Soil Mix for Soil Blocking
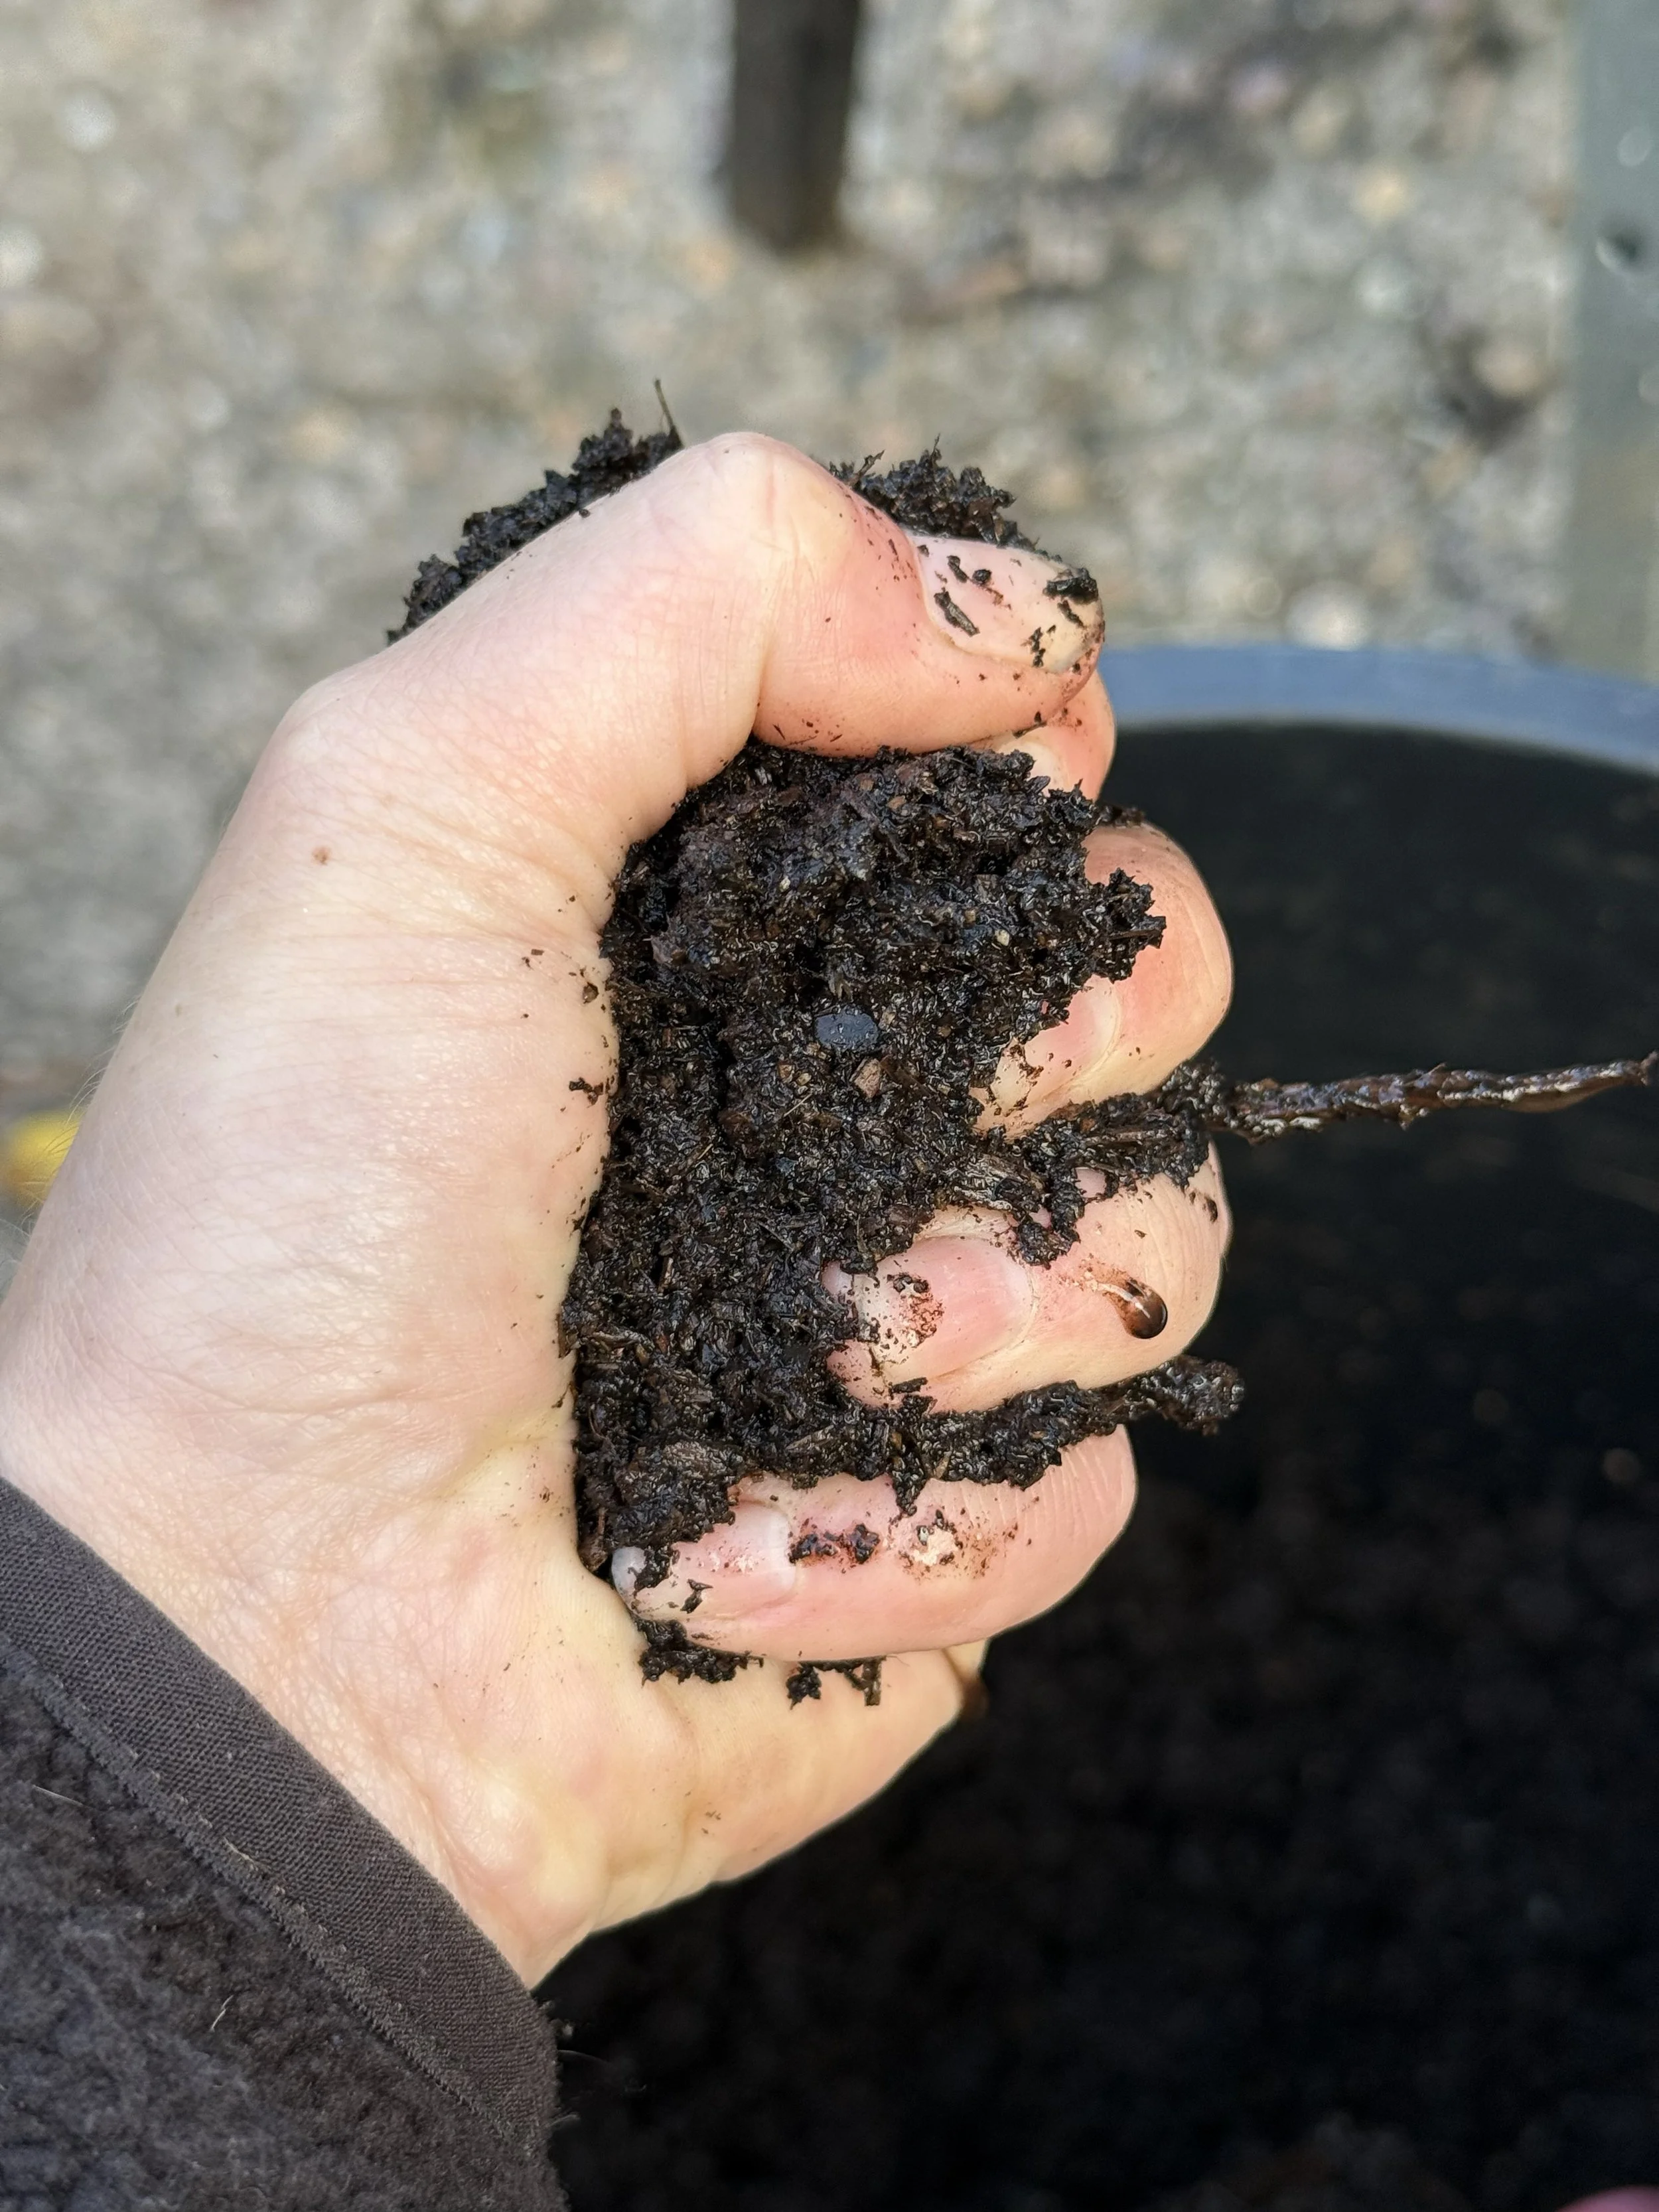
As with any seed starting, a good quality seed starting compost works best. A fine seed starting mix is required for soil blocking which allows it to stick together when you wet it. There’s lots of complex soil blocking recipes online but it doesn’t need to be complicated. I use my usual seed starting mix (Melcourt Sylvagrow) mixed with about 15% worm castings or homemade compost. The seed starting mix should be wet enough so that when you squeeze it together in your hand it sticks together and you can squeeze a few drops of water out of it.
I sometimes add some plant growth stimulants like liquid seaweed, humic/ fulvic acid or compost extract to the water to give the plants an extra boost, but it isn’t necessary.
Step-by-Step: How to Make Soil Blocks
Step 1: Mix and moisten the soil
Mix compost in a tray or bucket, add water until it balls together.
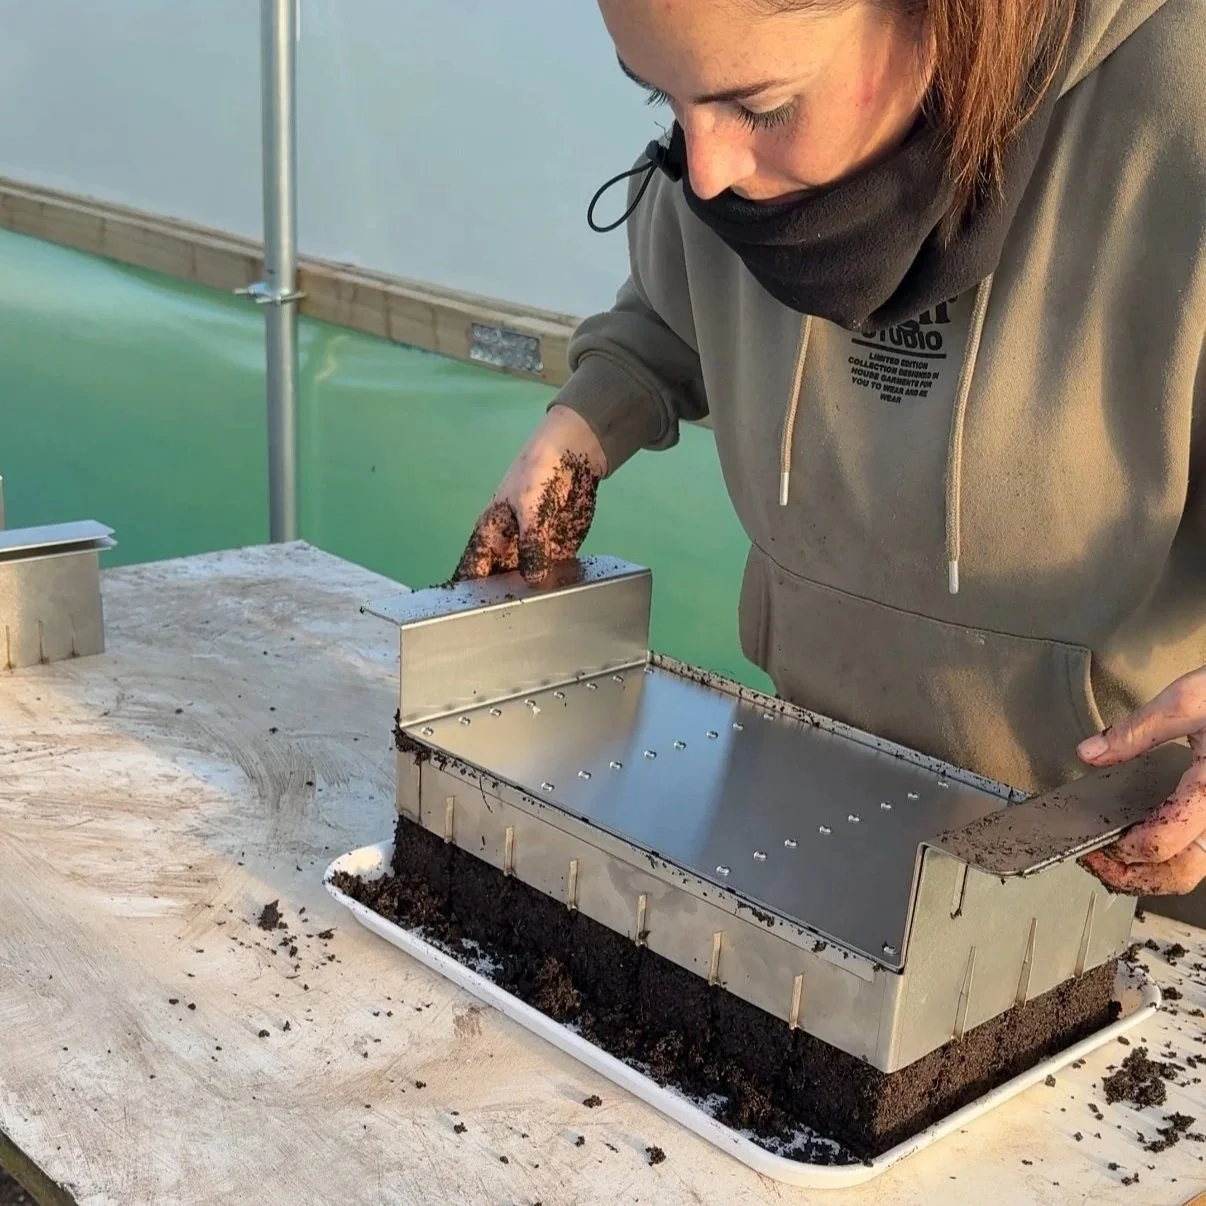
Step 2: Compress into the soil blocker
Press the mix firmly into the soil blocking tool
Fill completely, keep an eye out for unfilled blocks
Step 3: Release blocks into a tray
Place on a solid tray with no holes
Push out the blocks
Step 4: Sow seeds
Place seeds in the indentation
Step 5: Cover Seed
If required, cover the seed with compost or vermiculite
Caring for Soil Block Seedlings
How to water soil blocks
Proper watering is essential for healthy soil block seedlings. The best method is bottom watering, which allows the blocks to absorb water evenly from below and encourages strong root development.
Avoid using a direct stream of water on the blocks, as this can erode the compost and damage seedlings. Instead, add water to the bottom tray using a watering can or jug, letting the blocks soak it up naturally.
Check that your tray is level to ensure all blocks receive the same amount of moisture. If the water pools unevenly, gently tilt the tray to distribute it. Be careful not to overwater—tip out any excess water to prevent problems like root rot or mold.
With consistent bottom watering, soil blocks stay moist but not soggy, creating ideal conditions for seedlings to thrive.
Light
Provide soil blocked seedlings with enough natural daylight, or artifical light to prevent leggy seedlings. Leggy seedlings are more likely to be unhealthy and susceptible to pests and diseases.
Airflow
Providing airflow by opening doors and windows or using a fan will reduce problems with soil blocks like mold and root rot. It will also help to develop strong stems on your seedlings.
Feeding
Compost mixes often contain enough nutrients for early growth, but you can give weekly feeds of growth stimulants like liquid seaweed to improve plant health and immunity.
Snapdragons in Soil Blocks
Common Problems and How to Fix Them
How To stop soil Blocks falling apart
Sometimes soil blocks crumble or break, but most problems are easy to fix. Here are the main causes and solutions:
Causes
1. Soil mix too dry
If the blocking mix isn’t moist enough, it won’t hold together. You should be able to squeeze it into a ball that holds its shape.
2. Soil mix too chunky
Large fibrous pieces in the mix can prevent blocks from sticking. Use a finer compost or sieve your mix. Adding binding ingredients like worm castings or homemade compost can also help soil blocks hold their shape.
3. Improper watering
A direct stream of water can erode the blocks. Avoid watering from above with force.
Solutions
Get the moisture right: Adjust water so the soil feels damp and sticks together when pressed.
Choose the right texture: Fine compost and binding materials help maintain block integrity.
Water gently: Use bottom watering. Pour water into the tray below and allow the blocks to absorb it naturally.
Blocks drying out
Soil blocks can dry out faster than pots because they are exposed on all sides. Follow these tips to keep seedlings healthy:
1. Location matters
Keep soil blocks in a place that’s not too hot. If the temperature rises, provide some shade but ensure seedlings still receive enough light for even growth.
2. Bottom watering
Pour water gently into the bottom tray, allowing blocks to soak up moisture evenly. This keeps the blocks consistently hydrated without washing away the soil.
Tip: Check the tray daily and top up water as needed. Consistently moist but not soggy blocks produce the healthiest seedlings.
How to Prevent Mold on Soil blocks
Mold on soil blocks is can happen if there’s too much moisture and not enough ventilation. If you’re starting seeds indoors, add a fan to increase airflow and allow the blocks to dry slightly in between watering. If you’re starting soil blocks in a greenhouse or polytunnel, open the doors to increase airflow.
When to Transplant Soil Blocked Seedlings
Seedlings grown in soil blocks typically thrive in their blocks for around six weeks. Seed starting mixes are low in nutrients, relying on the energy stored in the seed to support early growth.
You’ll know it’s time to transplant when the roots have filled the soil block and the plant has developed several sets of true leaves. At this stage, seedlings can either be potted up into larger blocks or containers, or planted directly into the garden, depending on the season and your planting schedule.
Transplanting at the right time helps seedlings establish quickly with minimal stress, ensuring strong, healthy growth in the garden or greenhouse.
Is Soil Blocking Worth It?
Soil blocking is a simple and effective way to start seedlings while avoiding many of the problems associated with plastic pots and trays. By growing seedlings in compressed blocks of compost, roots are naturally air pruned, creating dense, healthy root systems without the risk of plants becoming root bound.
The result is stronger seedlings that experience less transplant shock and establish more quickly once planted out. Soil blocking also reduces reliance on disposable plastic trays, making it a more sustainable option for gardeners and growers.
Once you get the hang of the right soil mix and moisture level, soil blocking becomes a quick and reliable way to raise seedlings. Whether you're growing vegetables, herbs or cut flowers, it’s a method many growers adopt permanently after trying it for the first time.
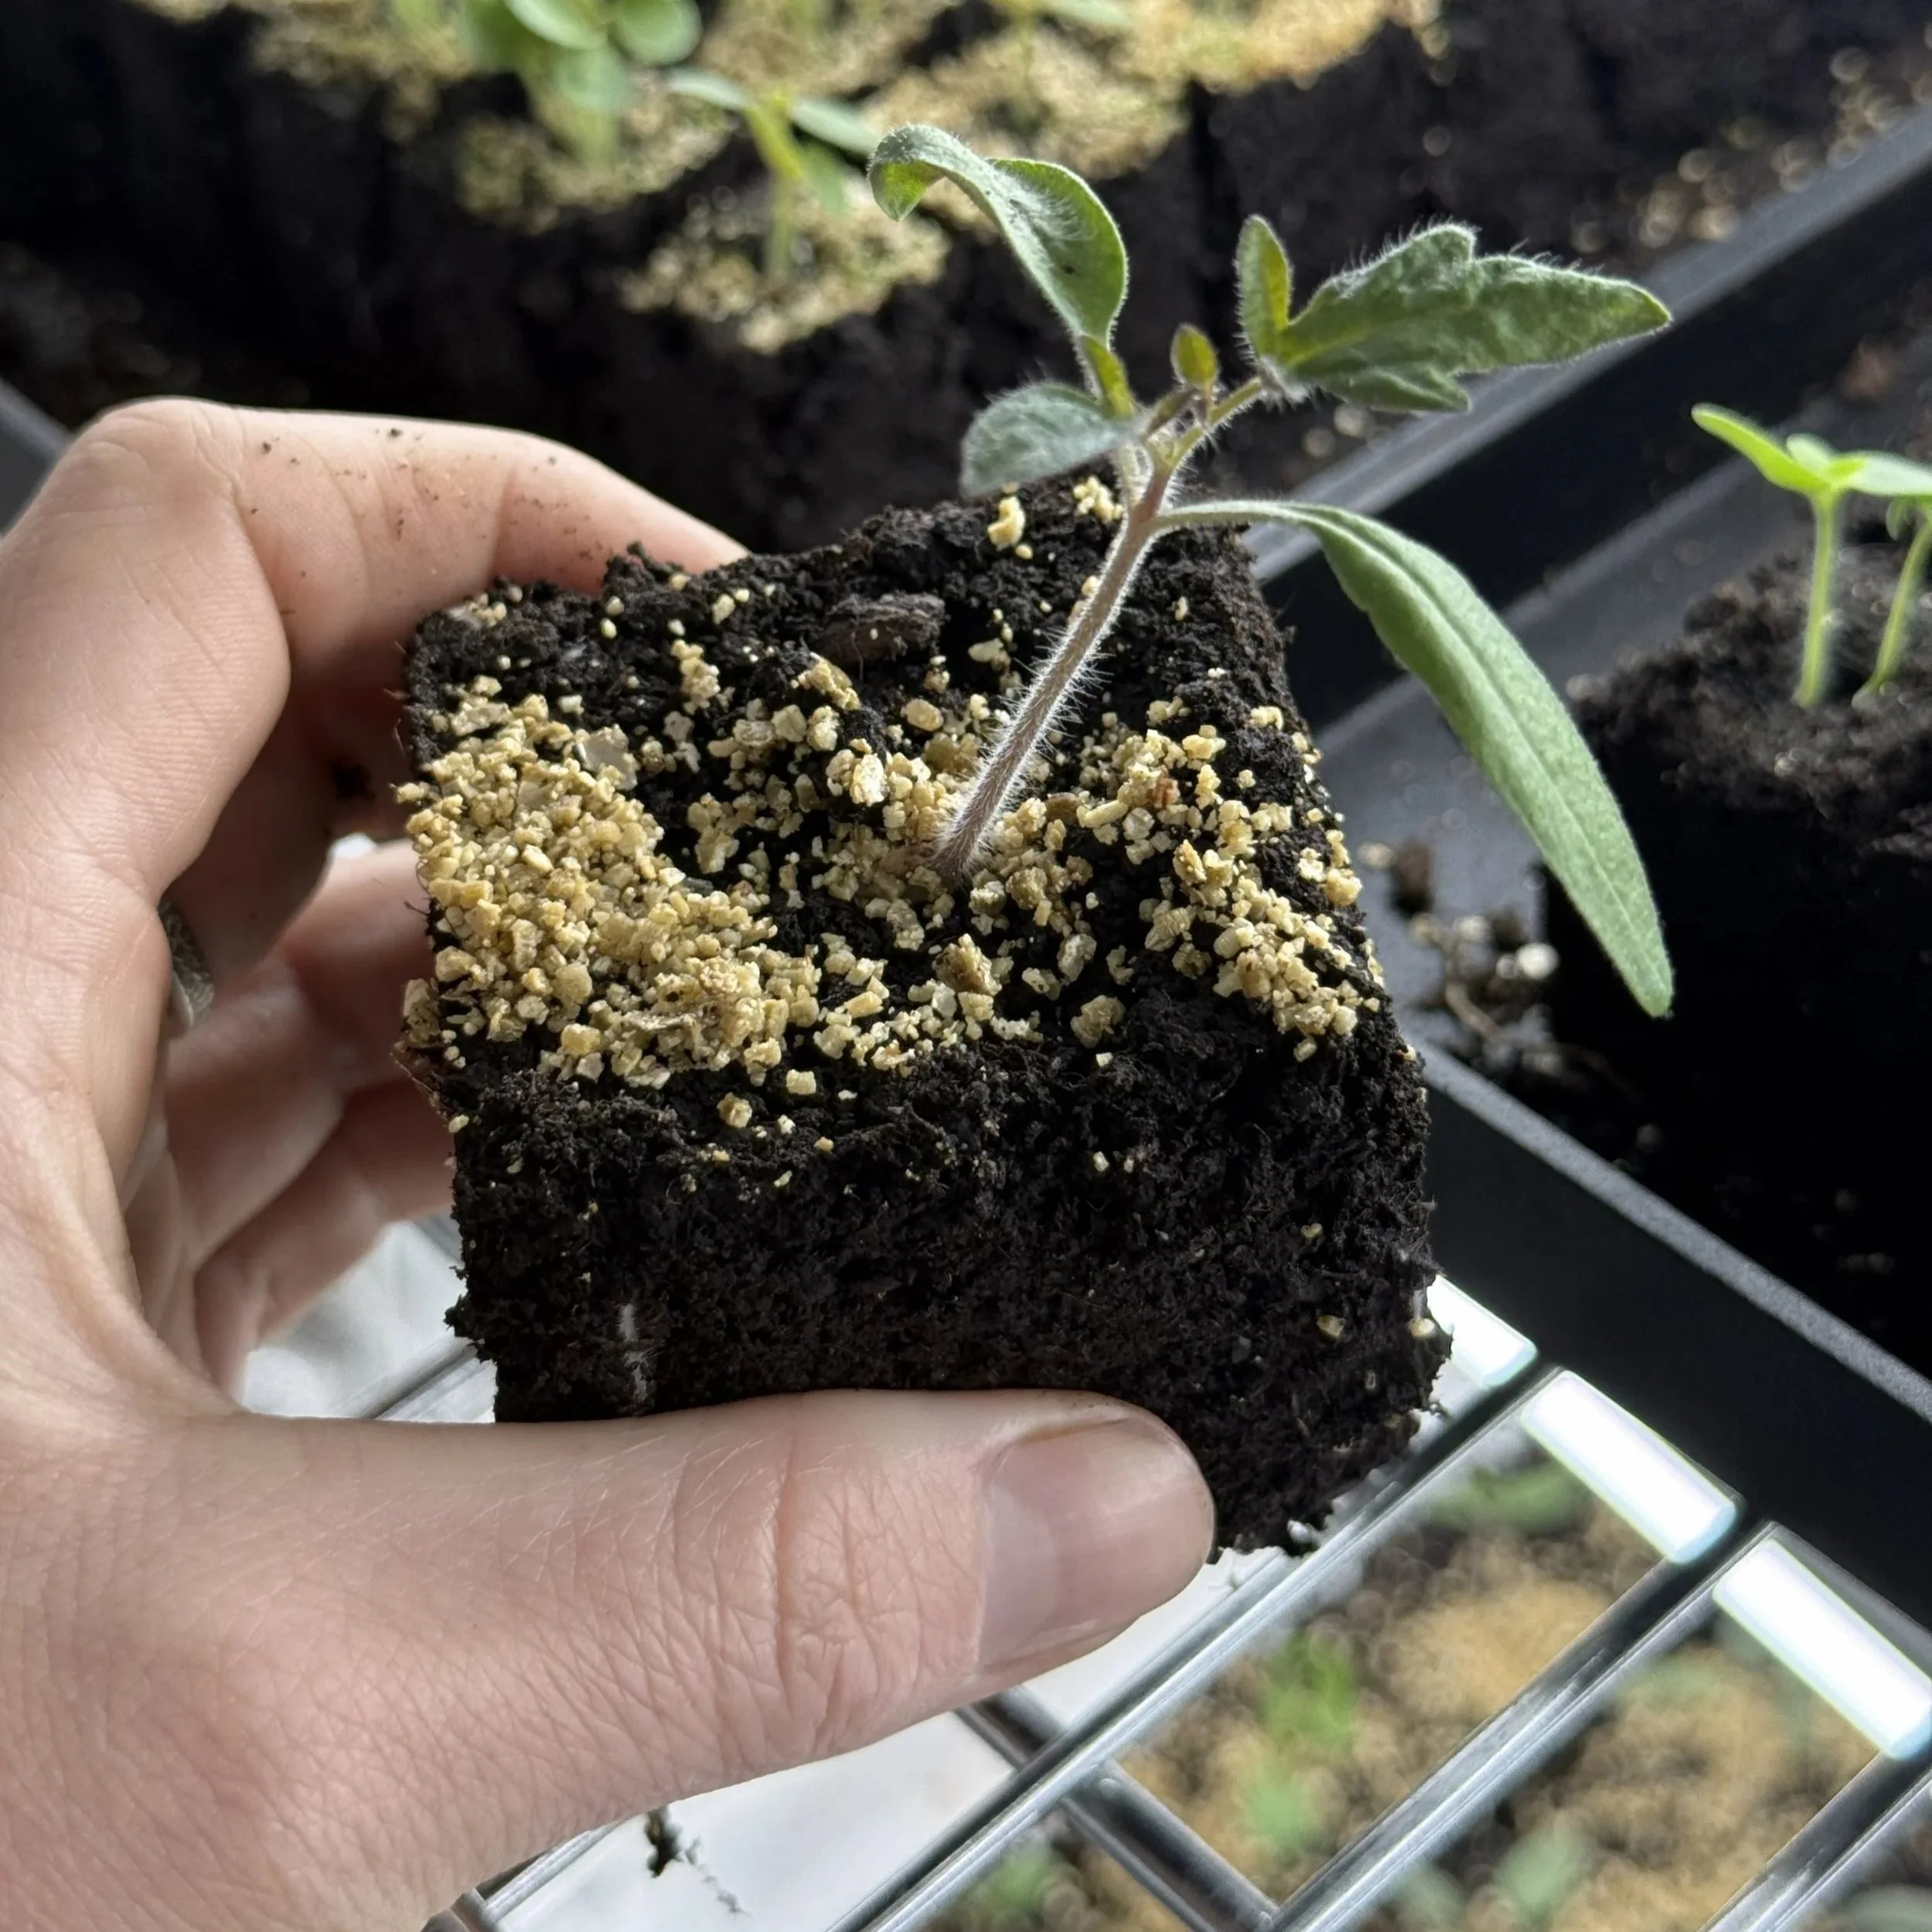
Tomato seedling in a soil block
FAQ: Soil Blocking
Do soil blocks dry out faster than pots?
Soil blocks can dry out slightly faster because they are exposed on all sides, but bottom watering and maintaining good humidity prevents this problem.
What seeds grow best in soil blocks?
Most vegetables, herbs, and flowers grow well in soil blocks. Crops like tomatoes, lettuce, basil, and zinnias are especially suited to this method.
Soil blocks are also ideal for plants that dislike root disturbance. Flowers such as nigella, larkspur, ammi, and phlox thrive when their roots remain intact in the block, producing healthier seedlings and reducing transplant shock.
Do you need a special soil mix for soil blocking?
A fine seed-starting mix works best because it binds together easily when moist.
Soil blocking is a simple, sustainable way to raise strong, healthy seedlings while reducing plastic waste and transplant shock. Once you get the hang of the right soil mix and watering routine, you’ll find the process quick, reliable, and enjoyable. Using a well-made soil blocker toolmakes creating uniform, sturdy blocks even easier, especially when starting large numbers of seedlings for your garden or flower farm. Paired with a solid bottom tray and your favorite seed starting mix, these tools help take the guesswork out of seed starting and let you focus on growing vibrant, thriving plants.